After my research on the Western King Battery, I wanted to shoot the location and gather a feeling for the site for myself. The plan for the shoot was to get up at 6 am to catch the morning light has it started to rise over the location. The blue and cold feel to the morning light is the tone that I think best suits the body of work that I am beginning to make as it does not make the viewer feel as at ease when viewing. I want a slight cool feel to run down the backs of my viewer when they are looking at these photographs as I am photographing defences which represent the horrors of the second world war.
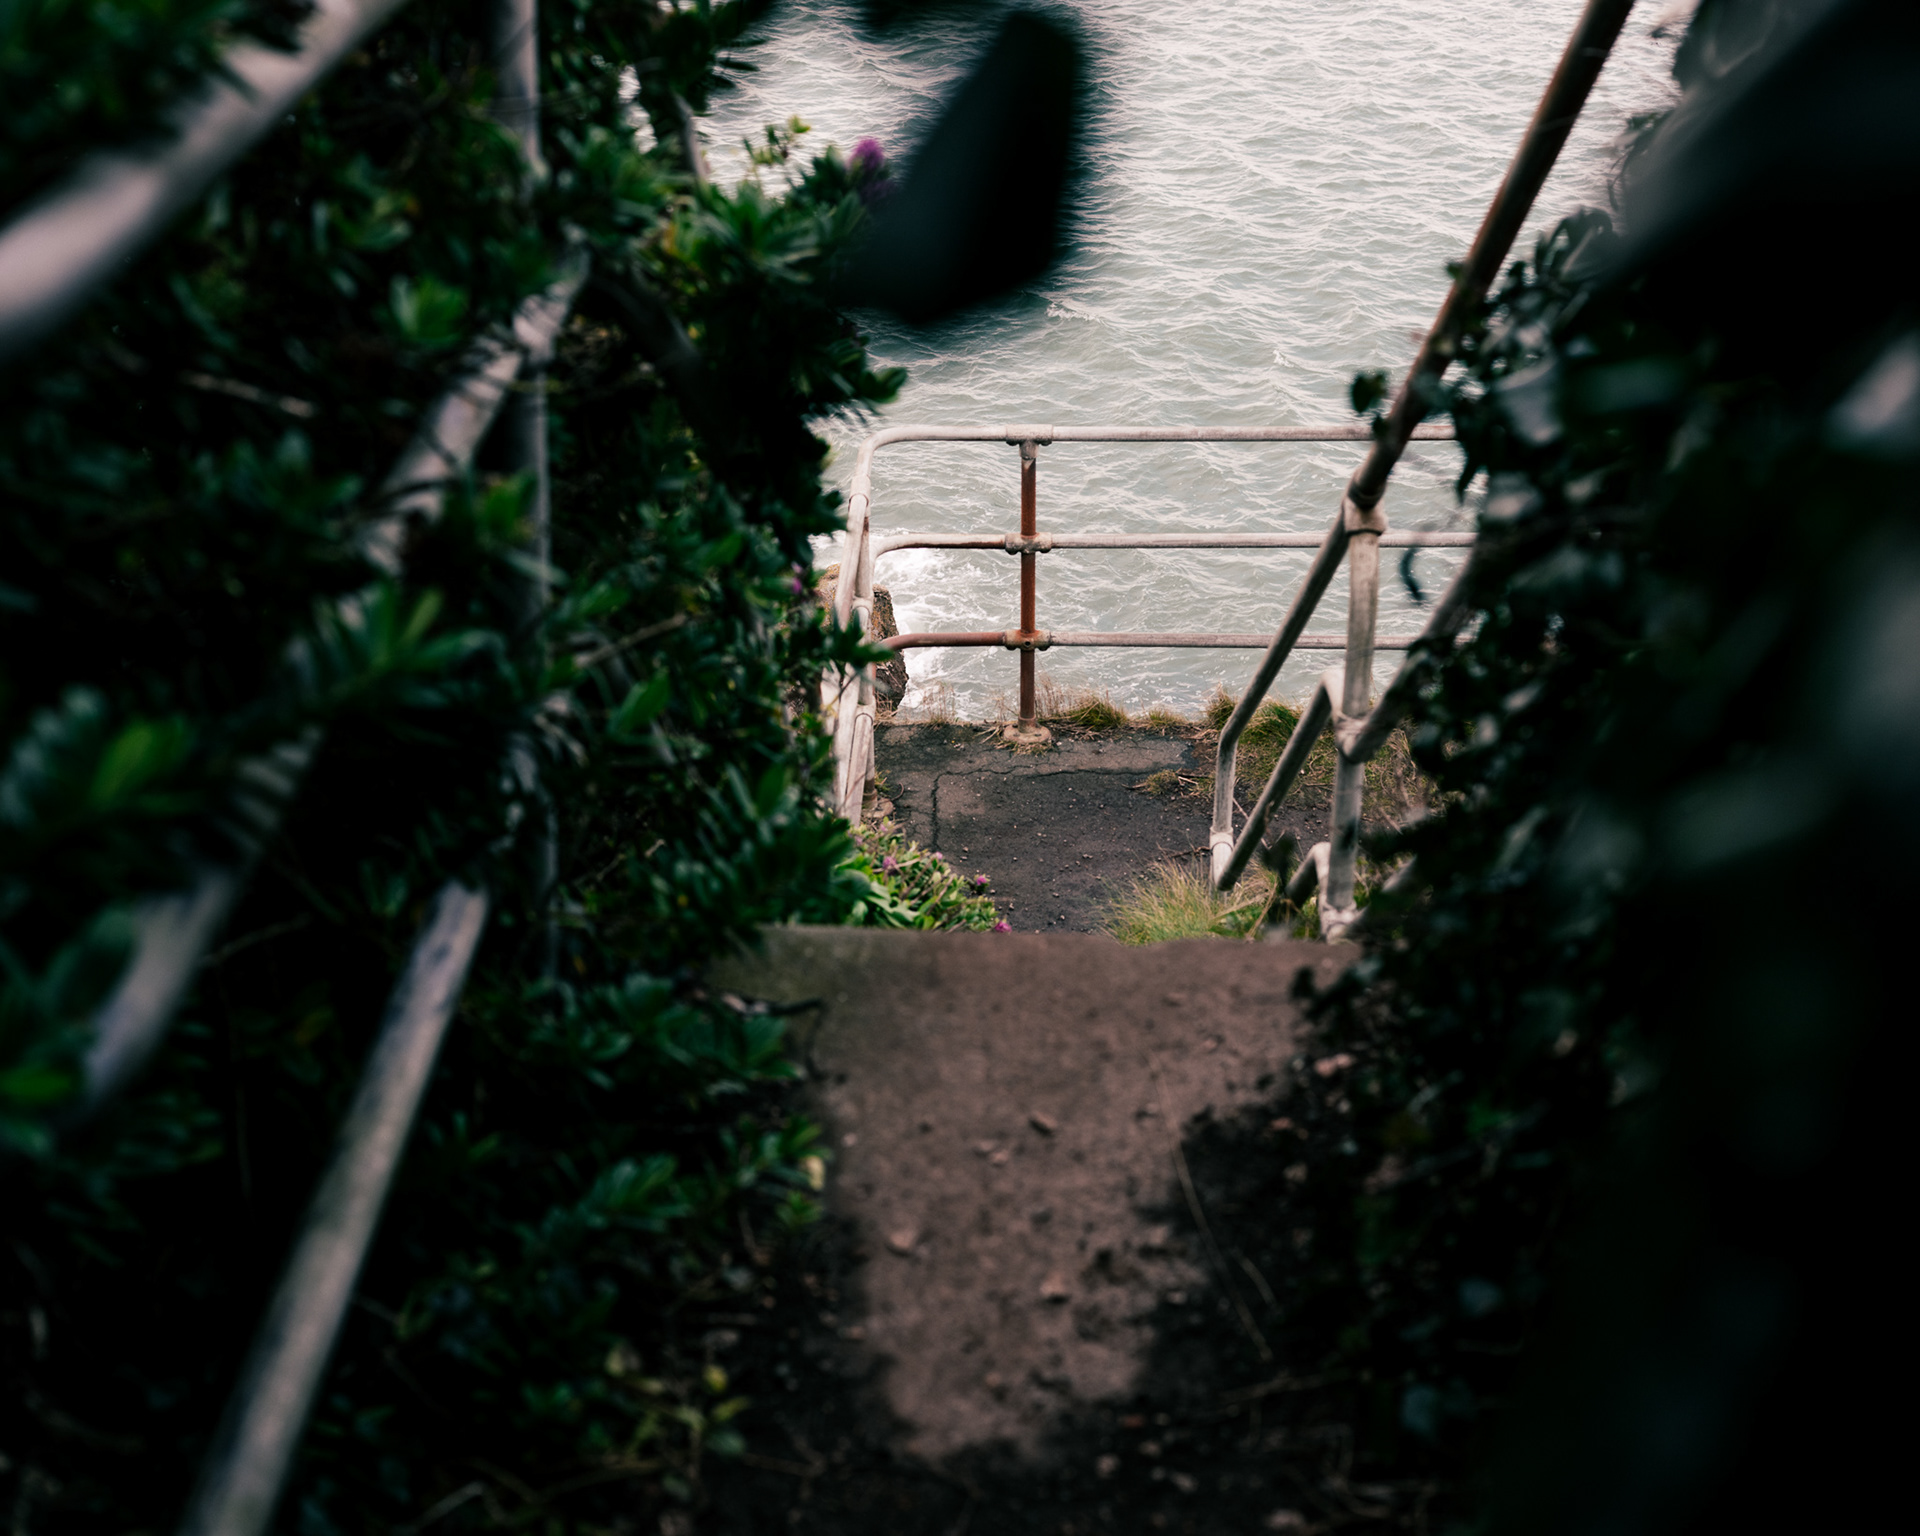
For this shoot, I shot on the Mamiya 7 and developed/ scanned the shots myself at home as well as digitally shooting on the Fujifilm GFX medium format camera which I acquired from Falmouth Uni. I took my tripod with me and shot most of my film shots on that as I was shooting on Portra 160 and at the beginning of the shoot, I did not have enough light to shoot freehand. Much like the shoot at the Brownstone Battery, I was trying to capture the sight as a passive observer, not getting too close to the subjects that I was capturing but also doing this to capture the cityscape in the background.
Overall, while on location I was happy with how the shoot went. The light was perfect for the first 10 minutes that I was on location and unfortunately gradually become more clouded over while I was there. I can not control what the weather does, however, I was I got onto location a tad earlier to perhaps have a little more time to shoot the sun light that was beaming onto some of the subjects.
Images shot on the Fujifilm GFX Medium Format Digital


Shooting on the Fujifilm GFX was an amazing experience having never shot medium format digital before. The control of the camera was the same as my Sony A7 which I shoot most of my digital work on. The mirrorless camera allows instant live view control which, when working as fast as you can with the light, was a lot faster than the time it takes to set up shot on the Mamiya 7. The 51 mega pixel capability allowed me to achieve a much higher quality and detailed photographs as I only have an entry-level scanner for my film. If I was able to use the college facilities at the moment then I would be able to achieve higher quality photographs taken on the Mamiya 7 by scanning them with the Flex Tight scanner. However, saying this, I do not think I have perfected the scanning setting that I am currently using so that is something that I need to sit down and perfect. When Editing the Fujifilm images I wanted to give the colours a pastel tone which I think I have achieved. This is something I will go into more detail further down in this shoot evaluation.
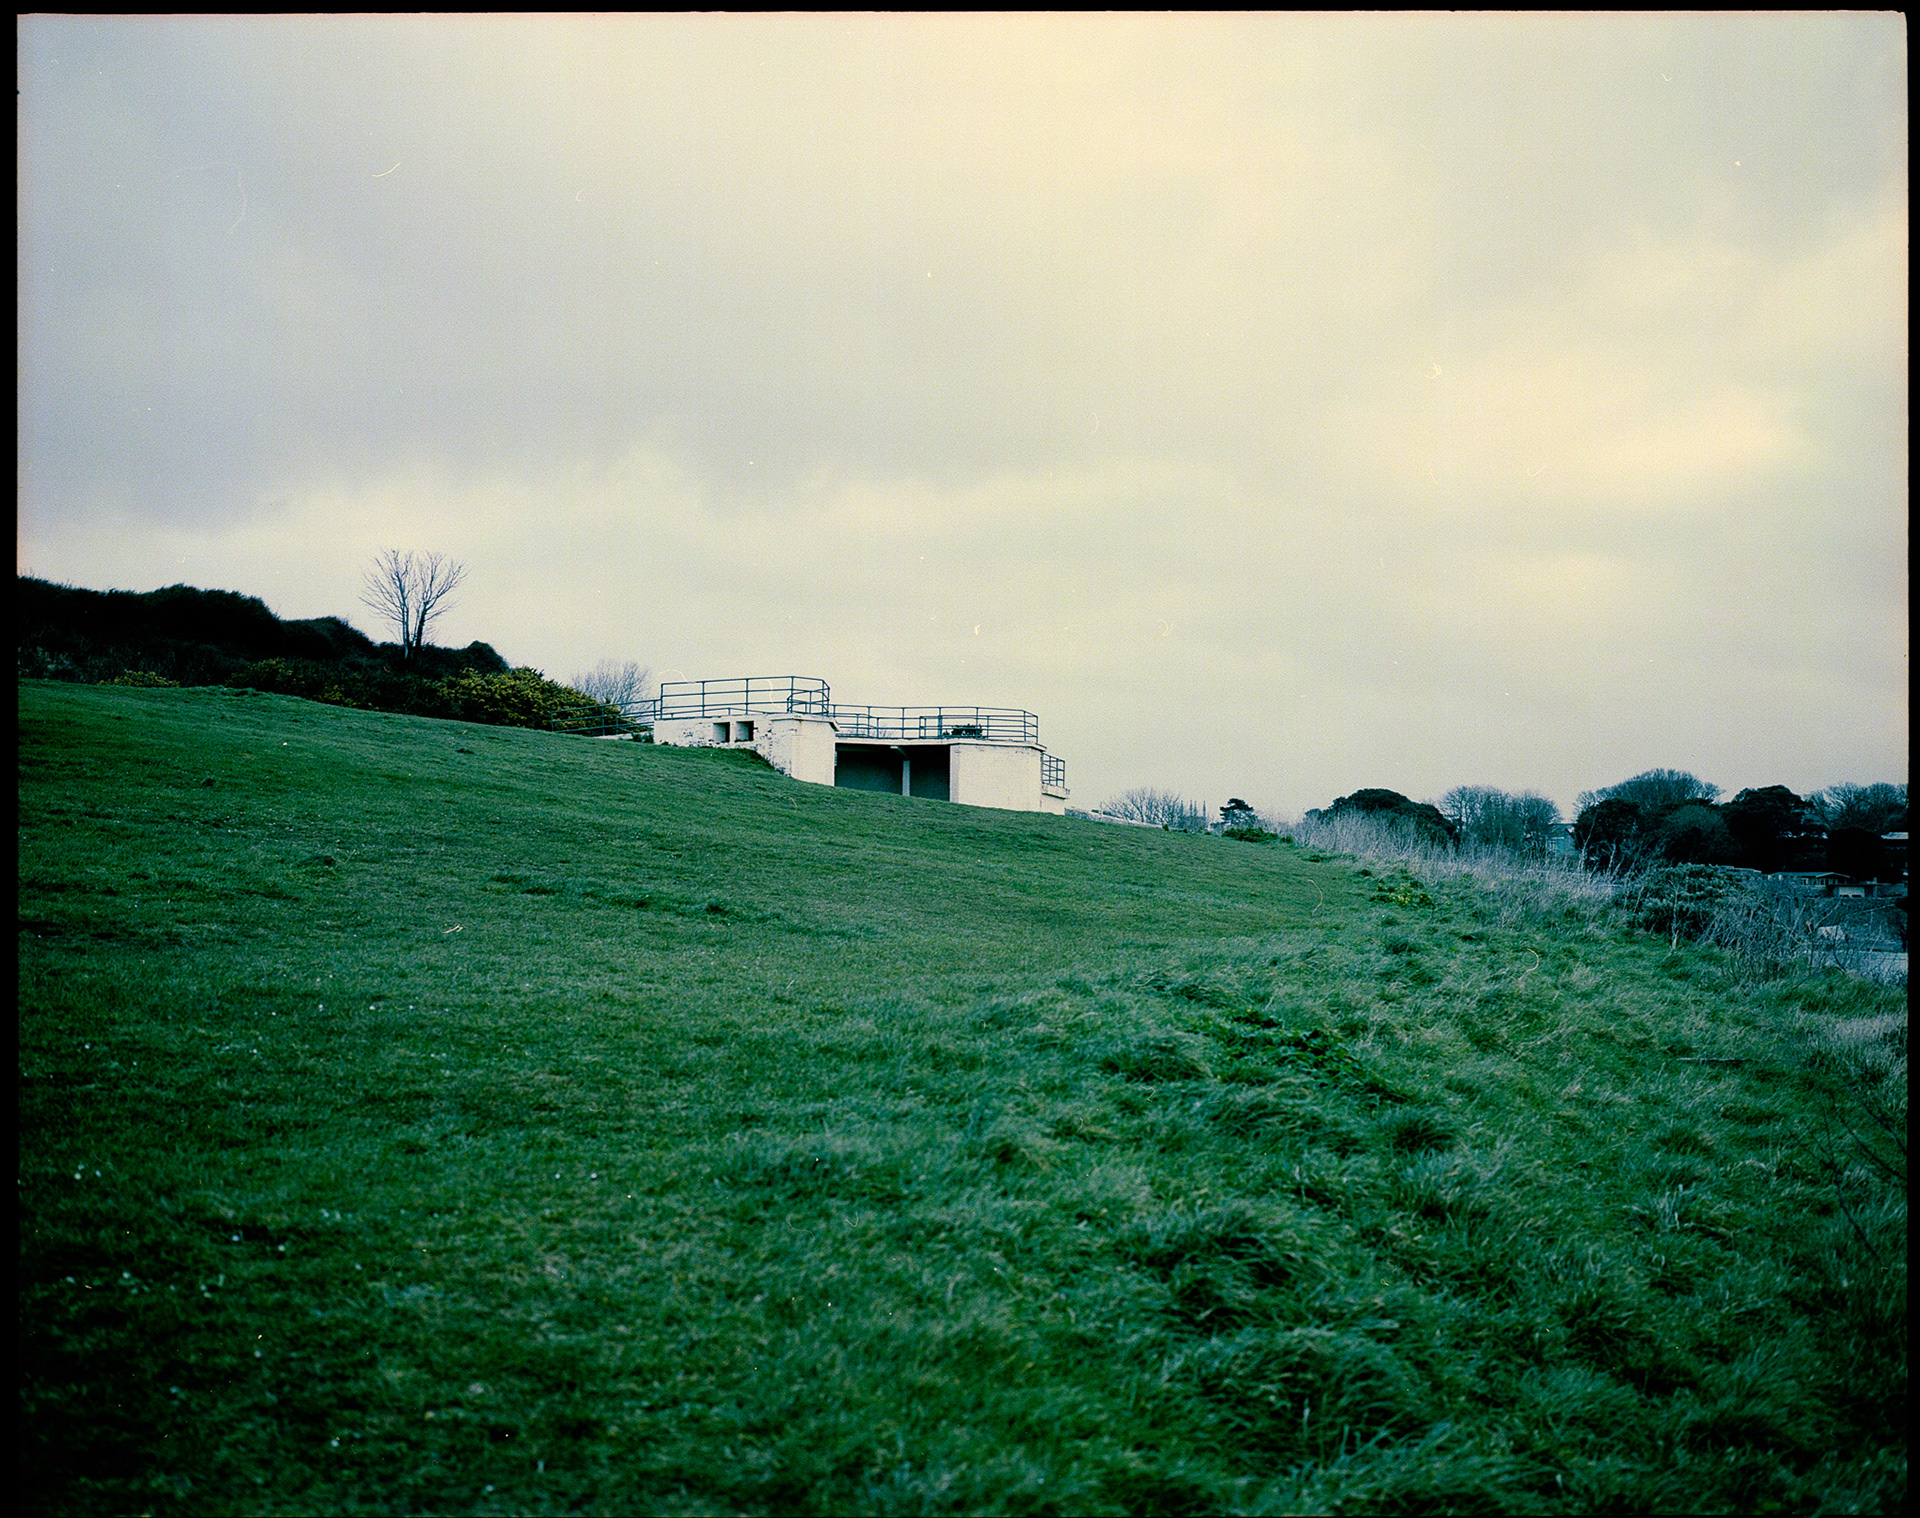
Photographs shot on Mamiya 7
Below you can see that I have placed the before and after images next to each other after I edited them. Some of the images are much stronger than others and I can admit that I struggled to get the white balance and colours corrected on some of the images. I have not worked with colour scanning much and I think I need to work on the process that I go through to scan the negatives. This is something that I would like to go back on and revise so that when I am scanning the film in the future I am more confident with the settings that I am using within the SilverFast program which subsequently will make me happier with the results. I have shot a few rolls of film already for this project and I am not too sure how happy I am with all the results that I have achieved so far. When I am spending all this money on buying the film and developing I want to be amazed by the results that I am achieving. I know that I need to work on and improve the photographs that I have already taken before I feel like I am ready to move on and shoot some more rolls of film.
Before

After
Here is an example of how I have not managed to balance the white balance equally to achieve the natural colours of the landscape. Though to start with, the photograph itself was shot slightly overexposed which I think is the reason that I have struggled to pull back the colours, shadows and colour balance of the image. For each of these images, I sent them across to Photoshop from Lightroom to correct the colour. Using the Raw camera filter, I had more white balance control compared to the Lightroom setting which gave me more space to pull the colour correction out of the photographs. The main struggle that I had with all of these images was the purple tinge that you can see within many of the photographs. After doing some reading, I think that this is to do with the scan settings that I was using so this is something that I need to refine in the future.
Before

After
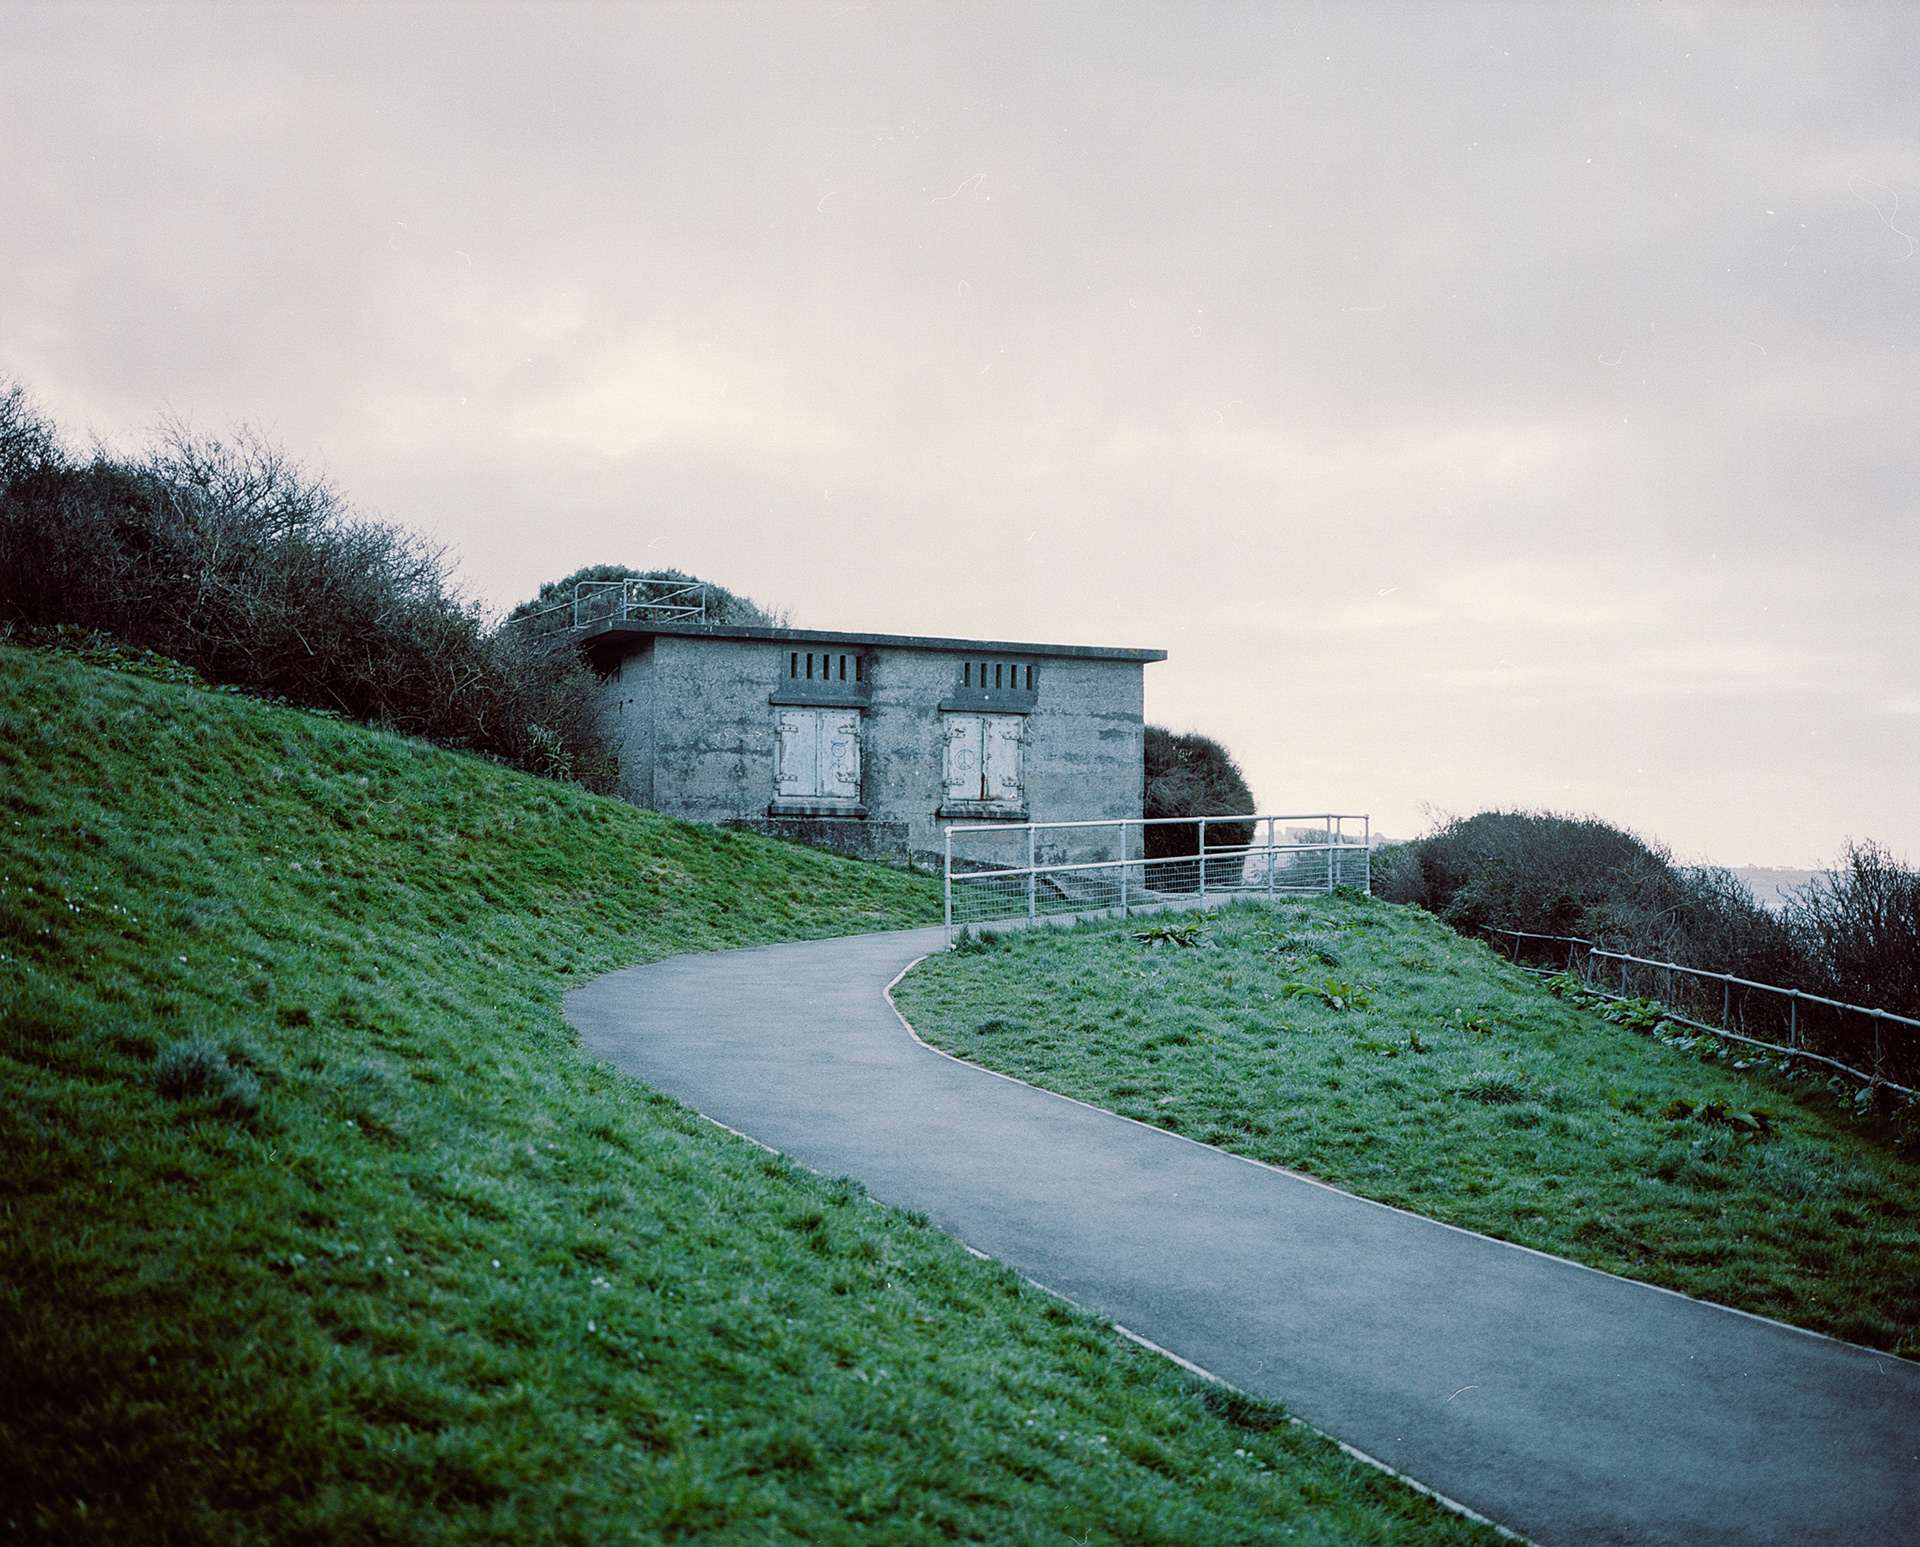
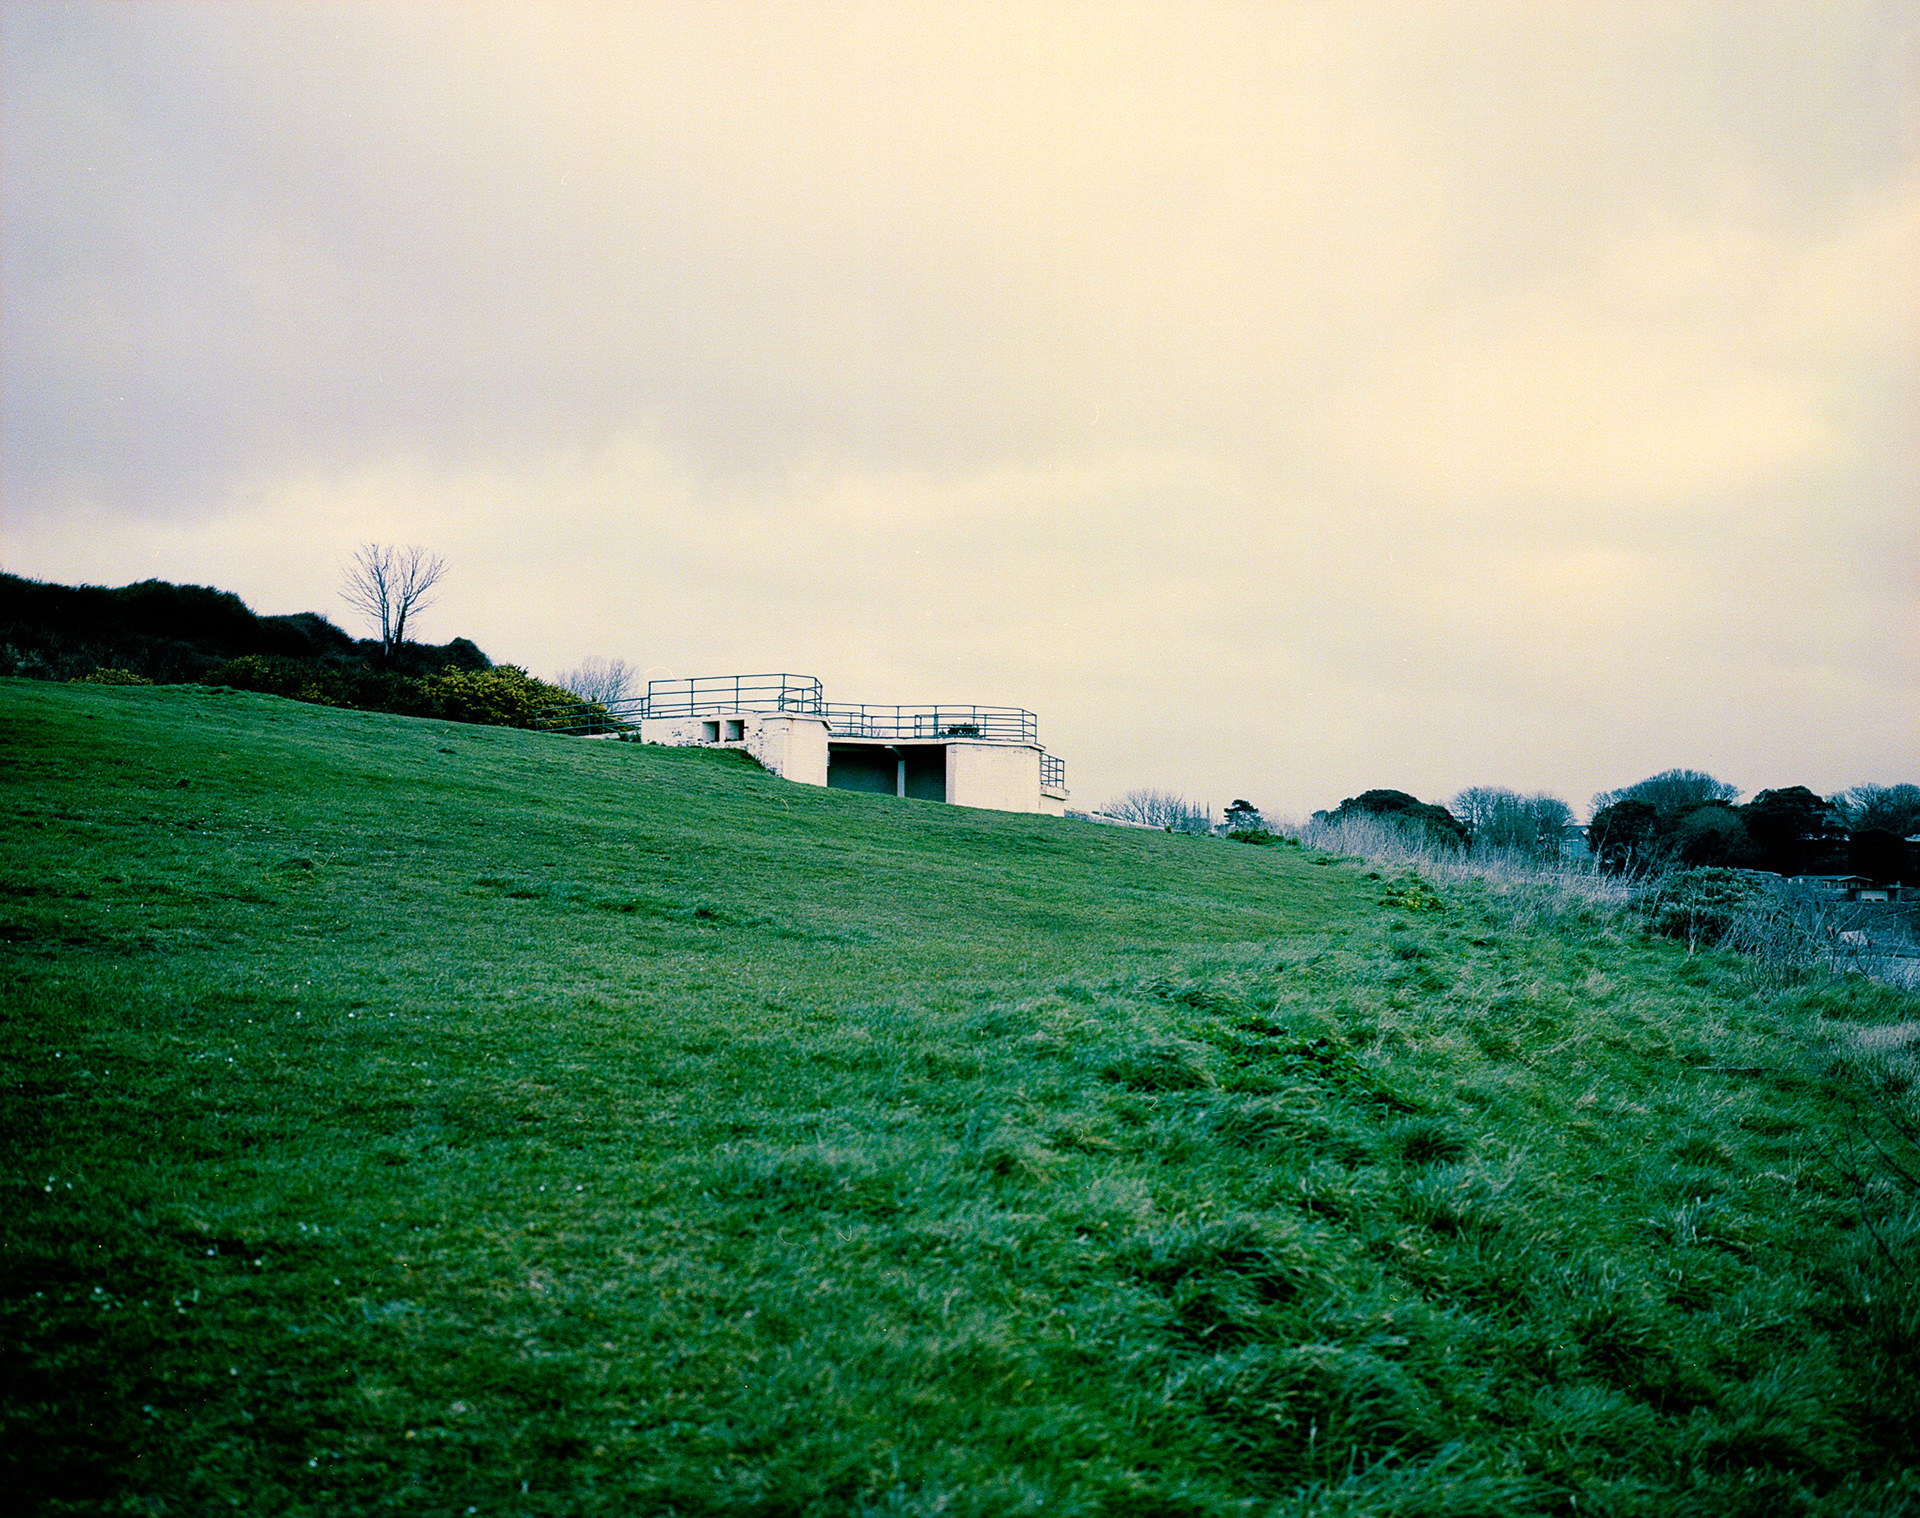
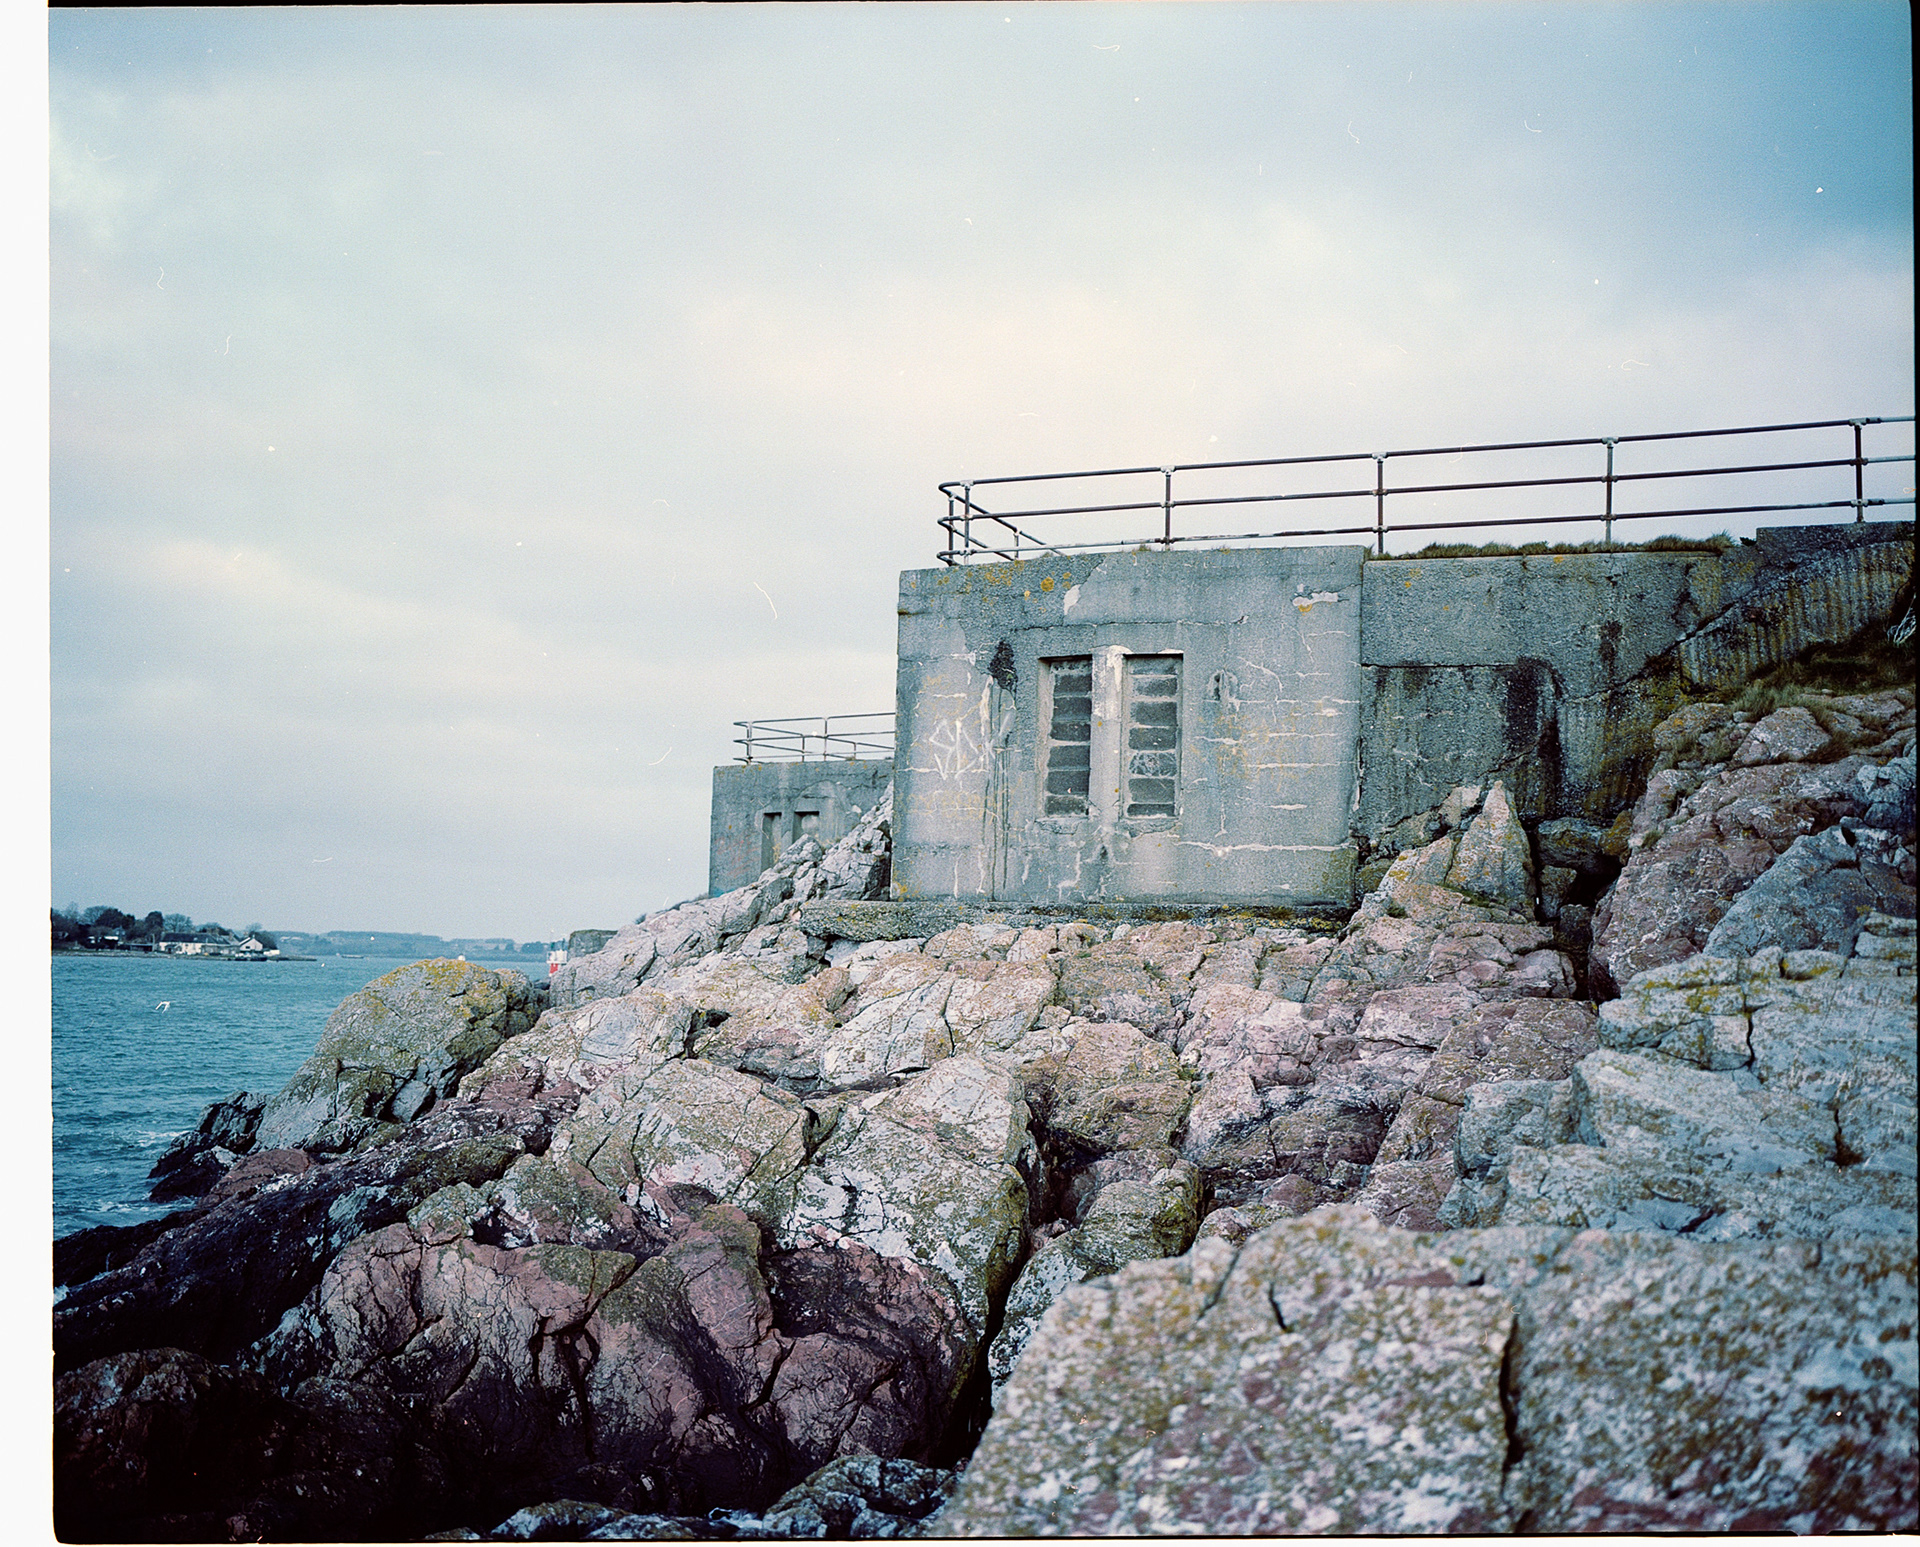
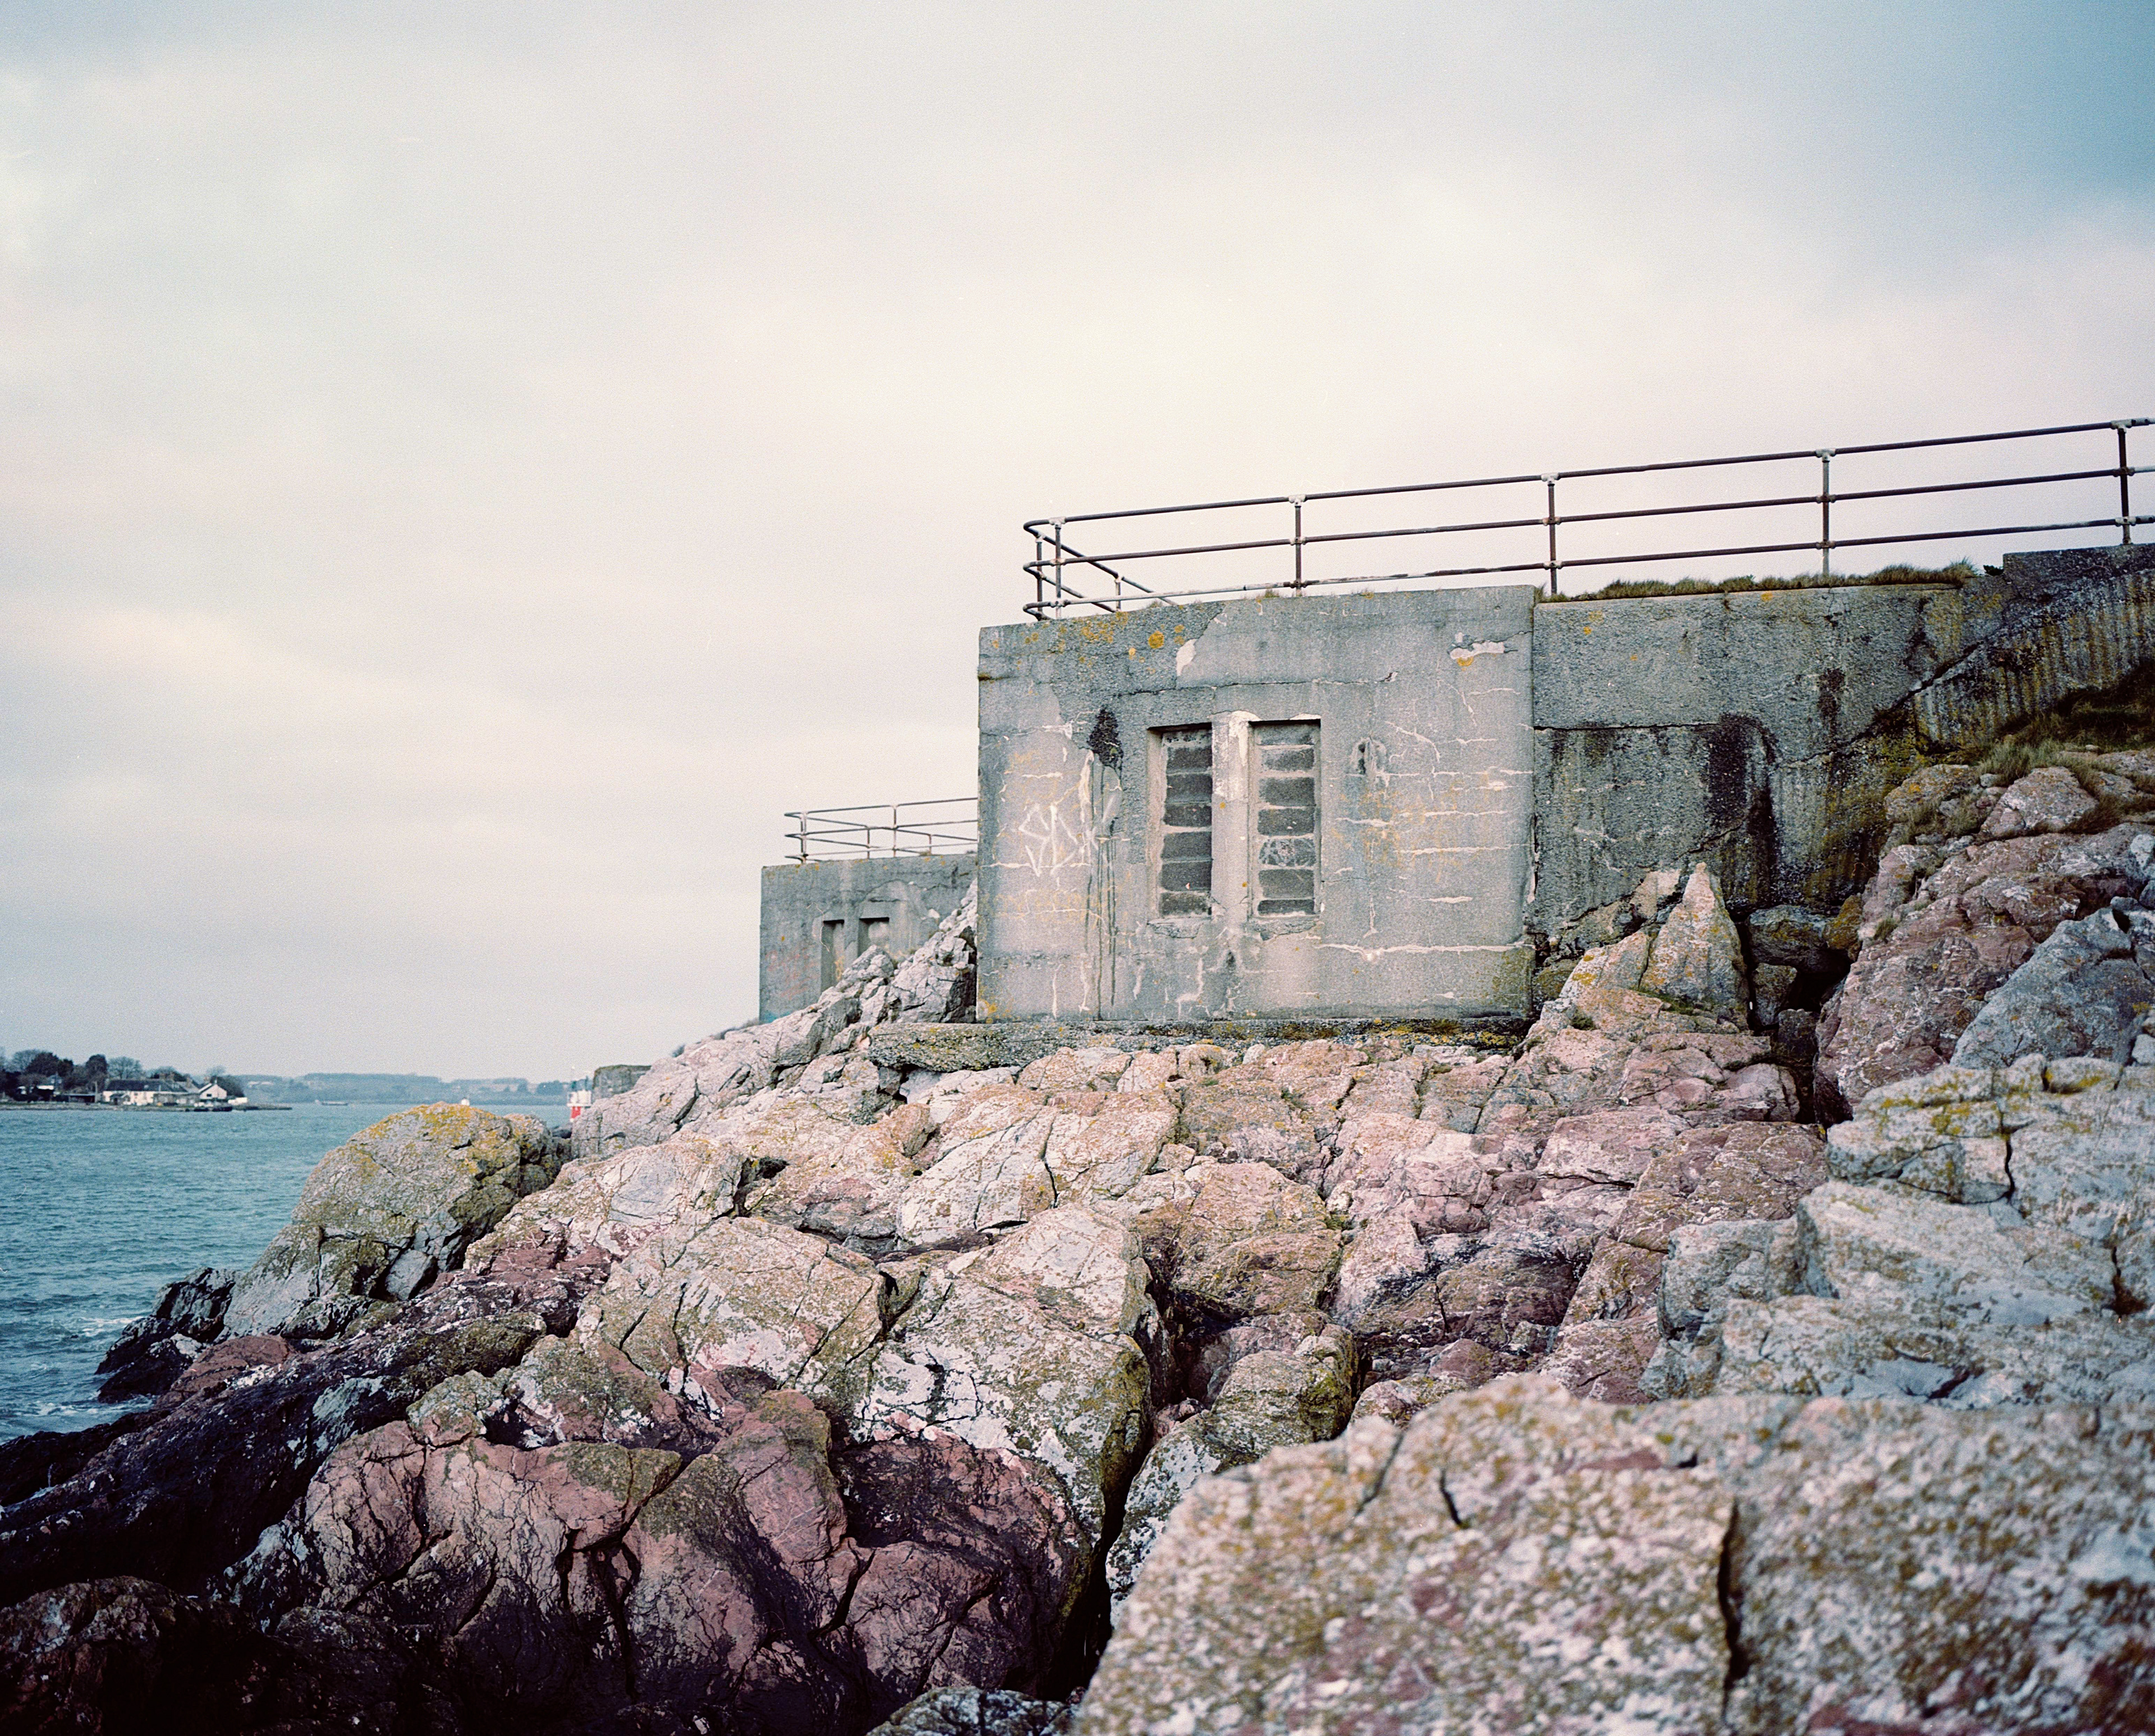
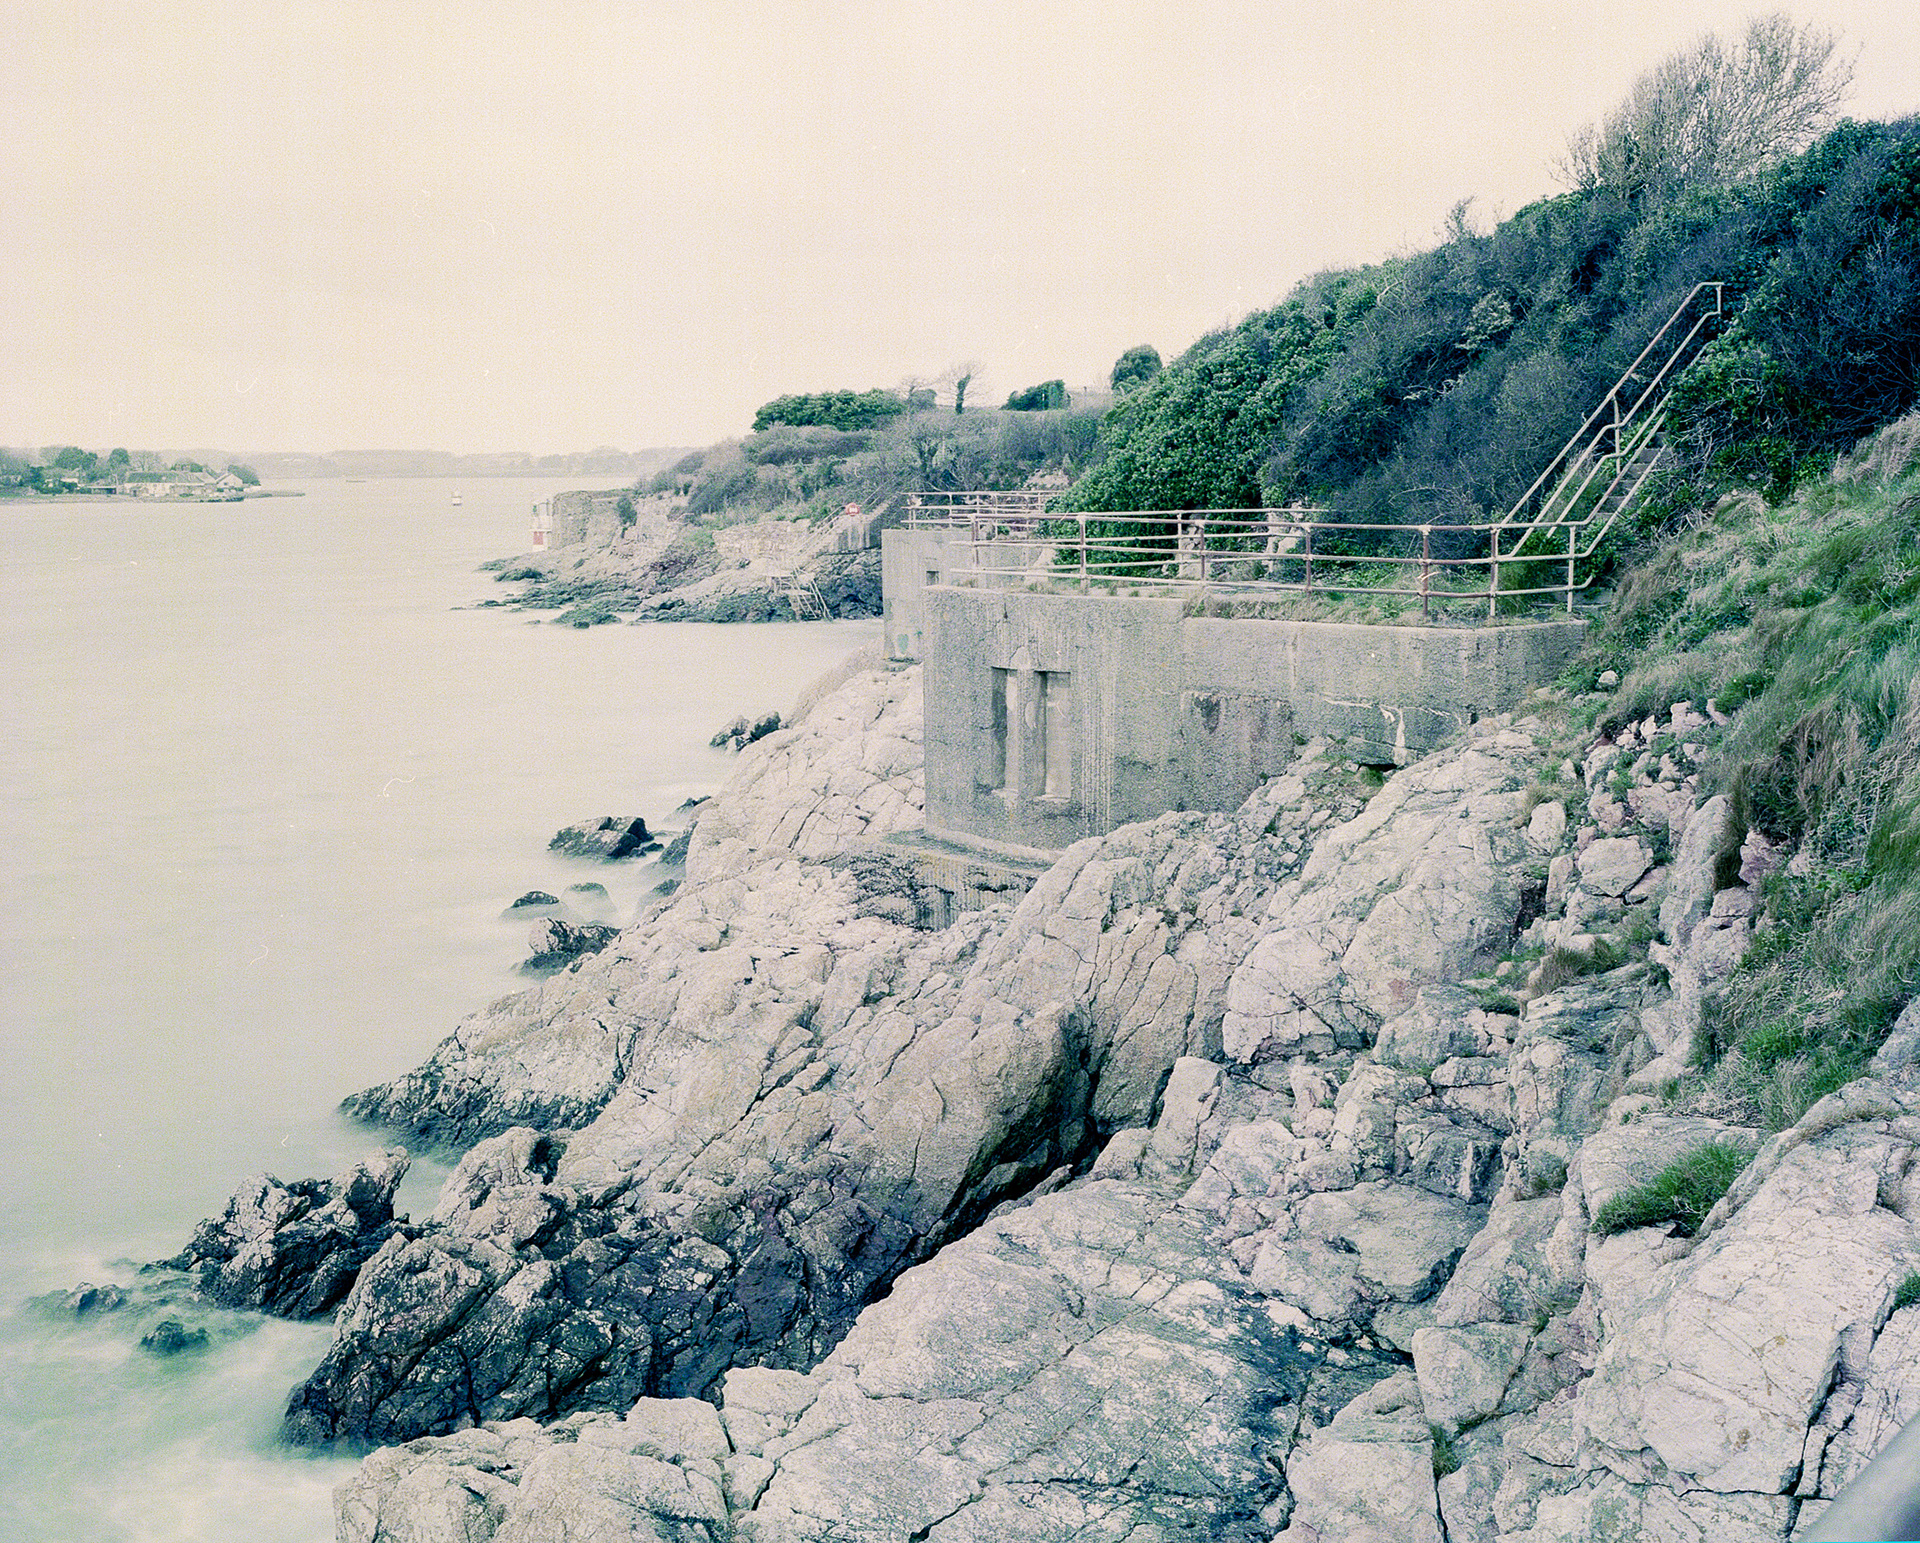
I think that this is one of the best achieved images that I made for this shoot. As you can see, the colour balance edit was subtle and not much was needed in order to improve the photograph. The main colour that I was trying to get the most accurate was the grey in the concrete building. A seen in the before image, the tones in the building were rather blue which is where I wanted to obtain the most natural colour. It is in the center of the images and the focus which draws the viewer in so I wanted the colour to stand out more boldly.
Before

After
The difference between these two images are extremely subtle, but they are there. I struggled to advance the white balance in this image, I did slightly turn the contrast and vibrance up a tiny amount. Overall, I was fairly happy with the scan of this photograph. If I was to return to this image to use it in the future for this body of work then I would isolate the sky and adjust the white balance of that separately to reduce the purple tinge around the clouds. The process that I went through with this image is much similar to the image below.
Before
After
Before
After
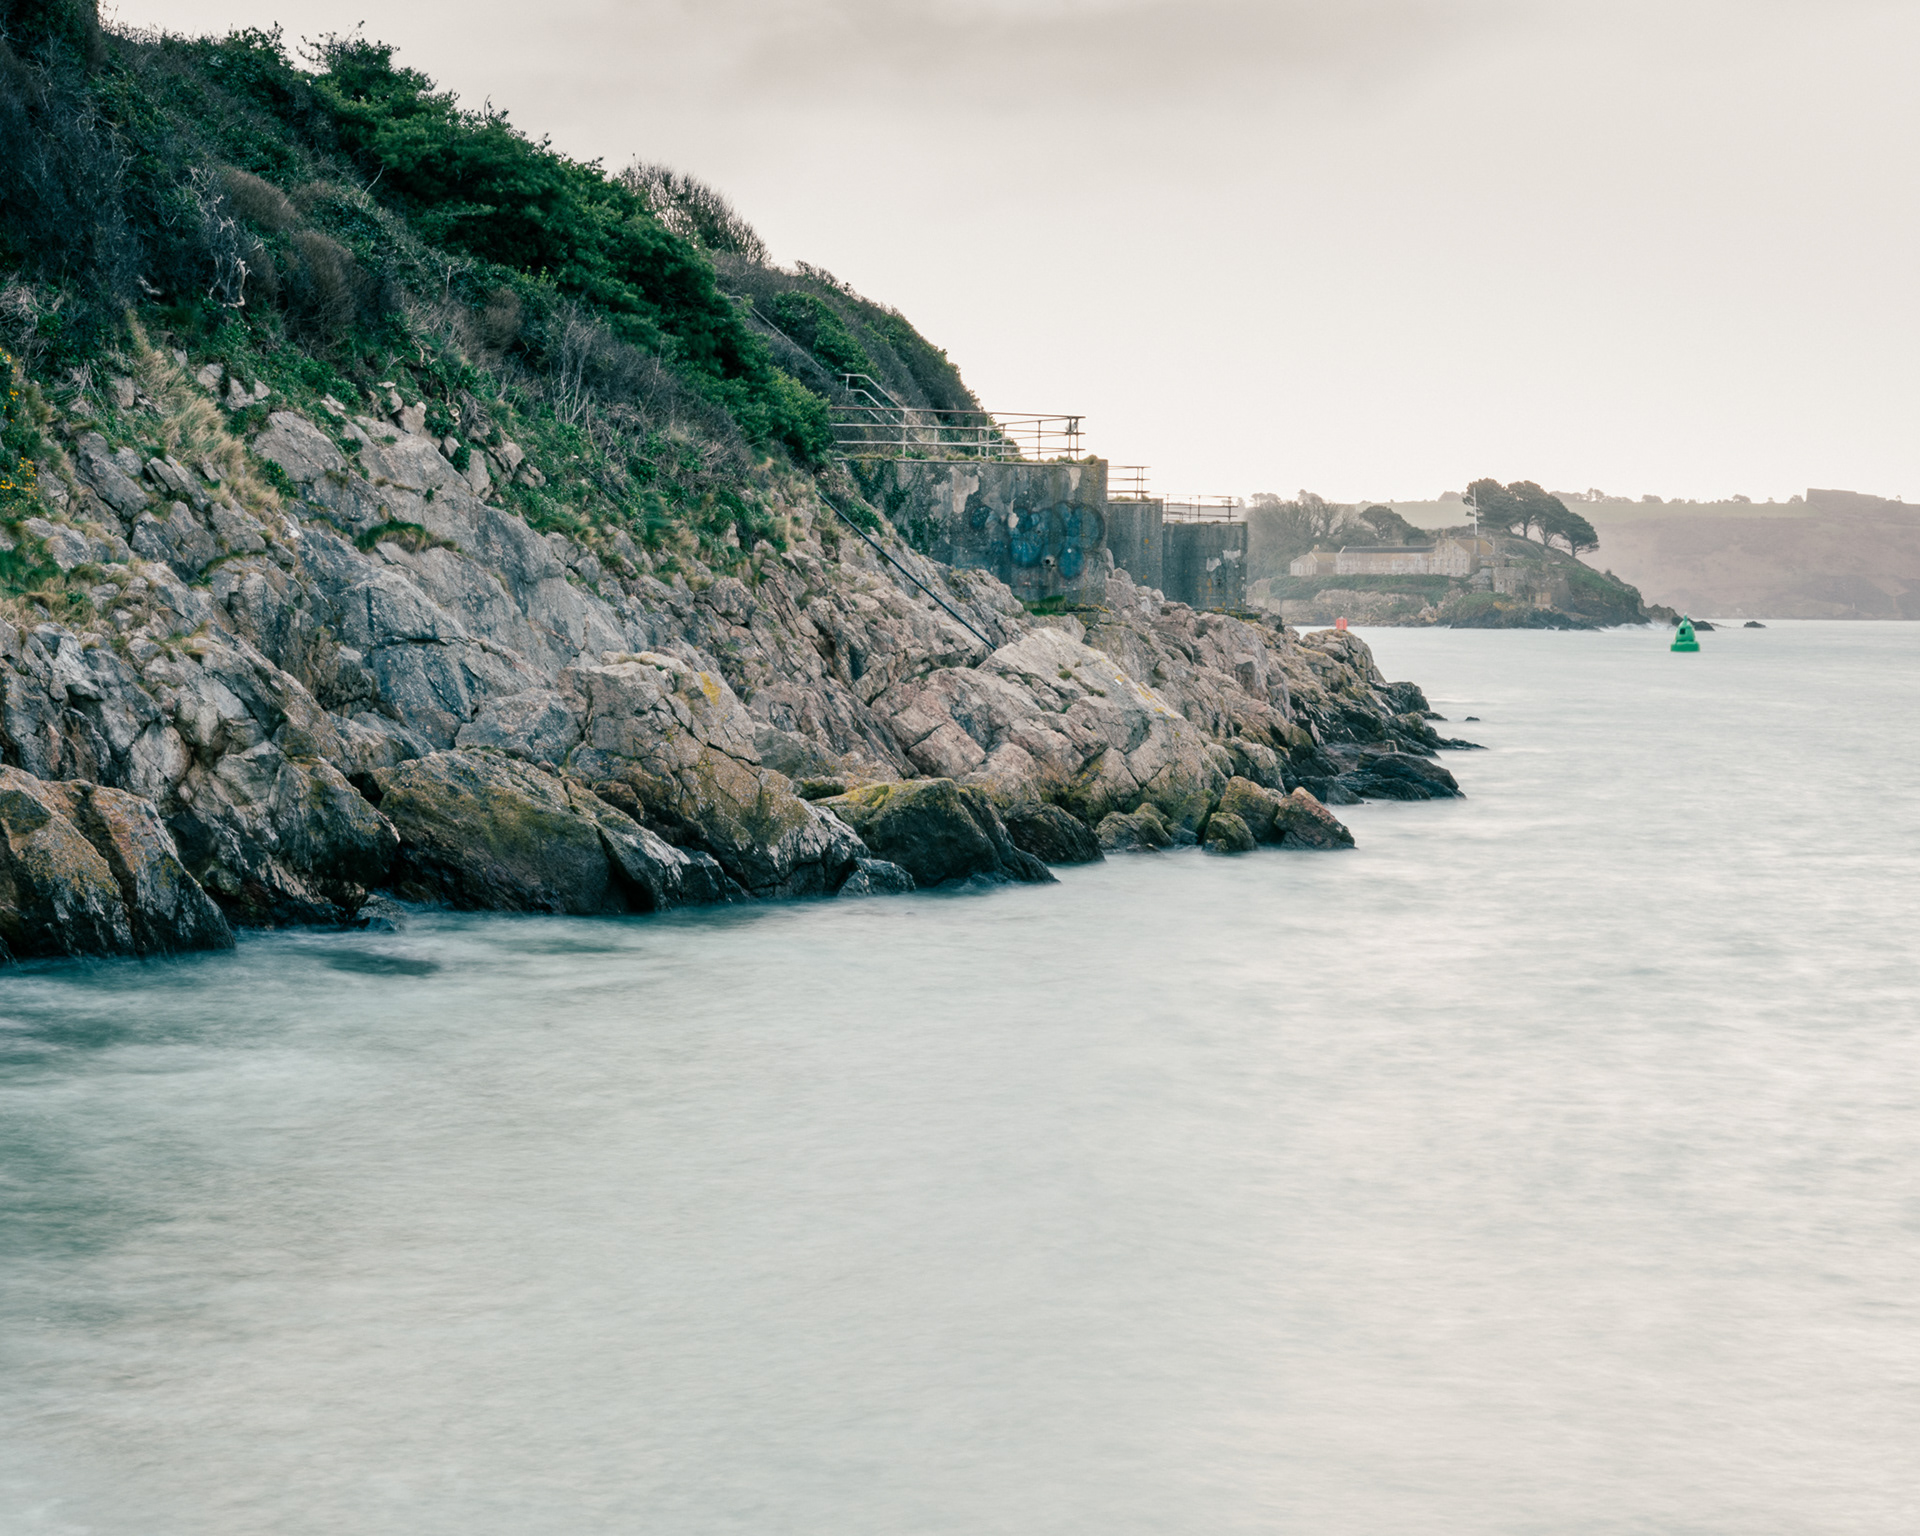
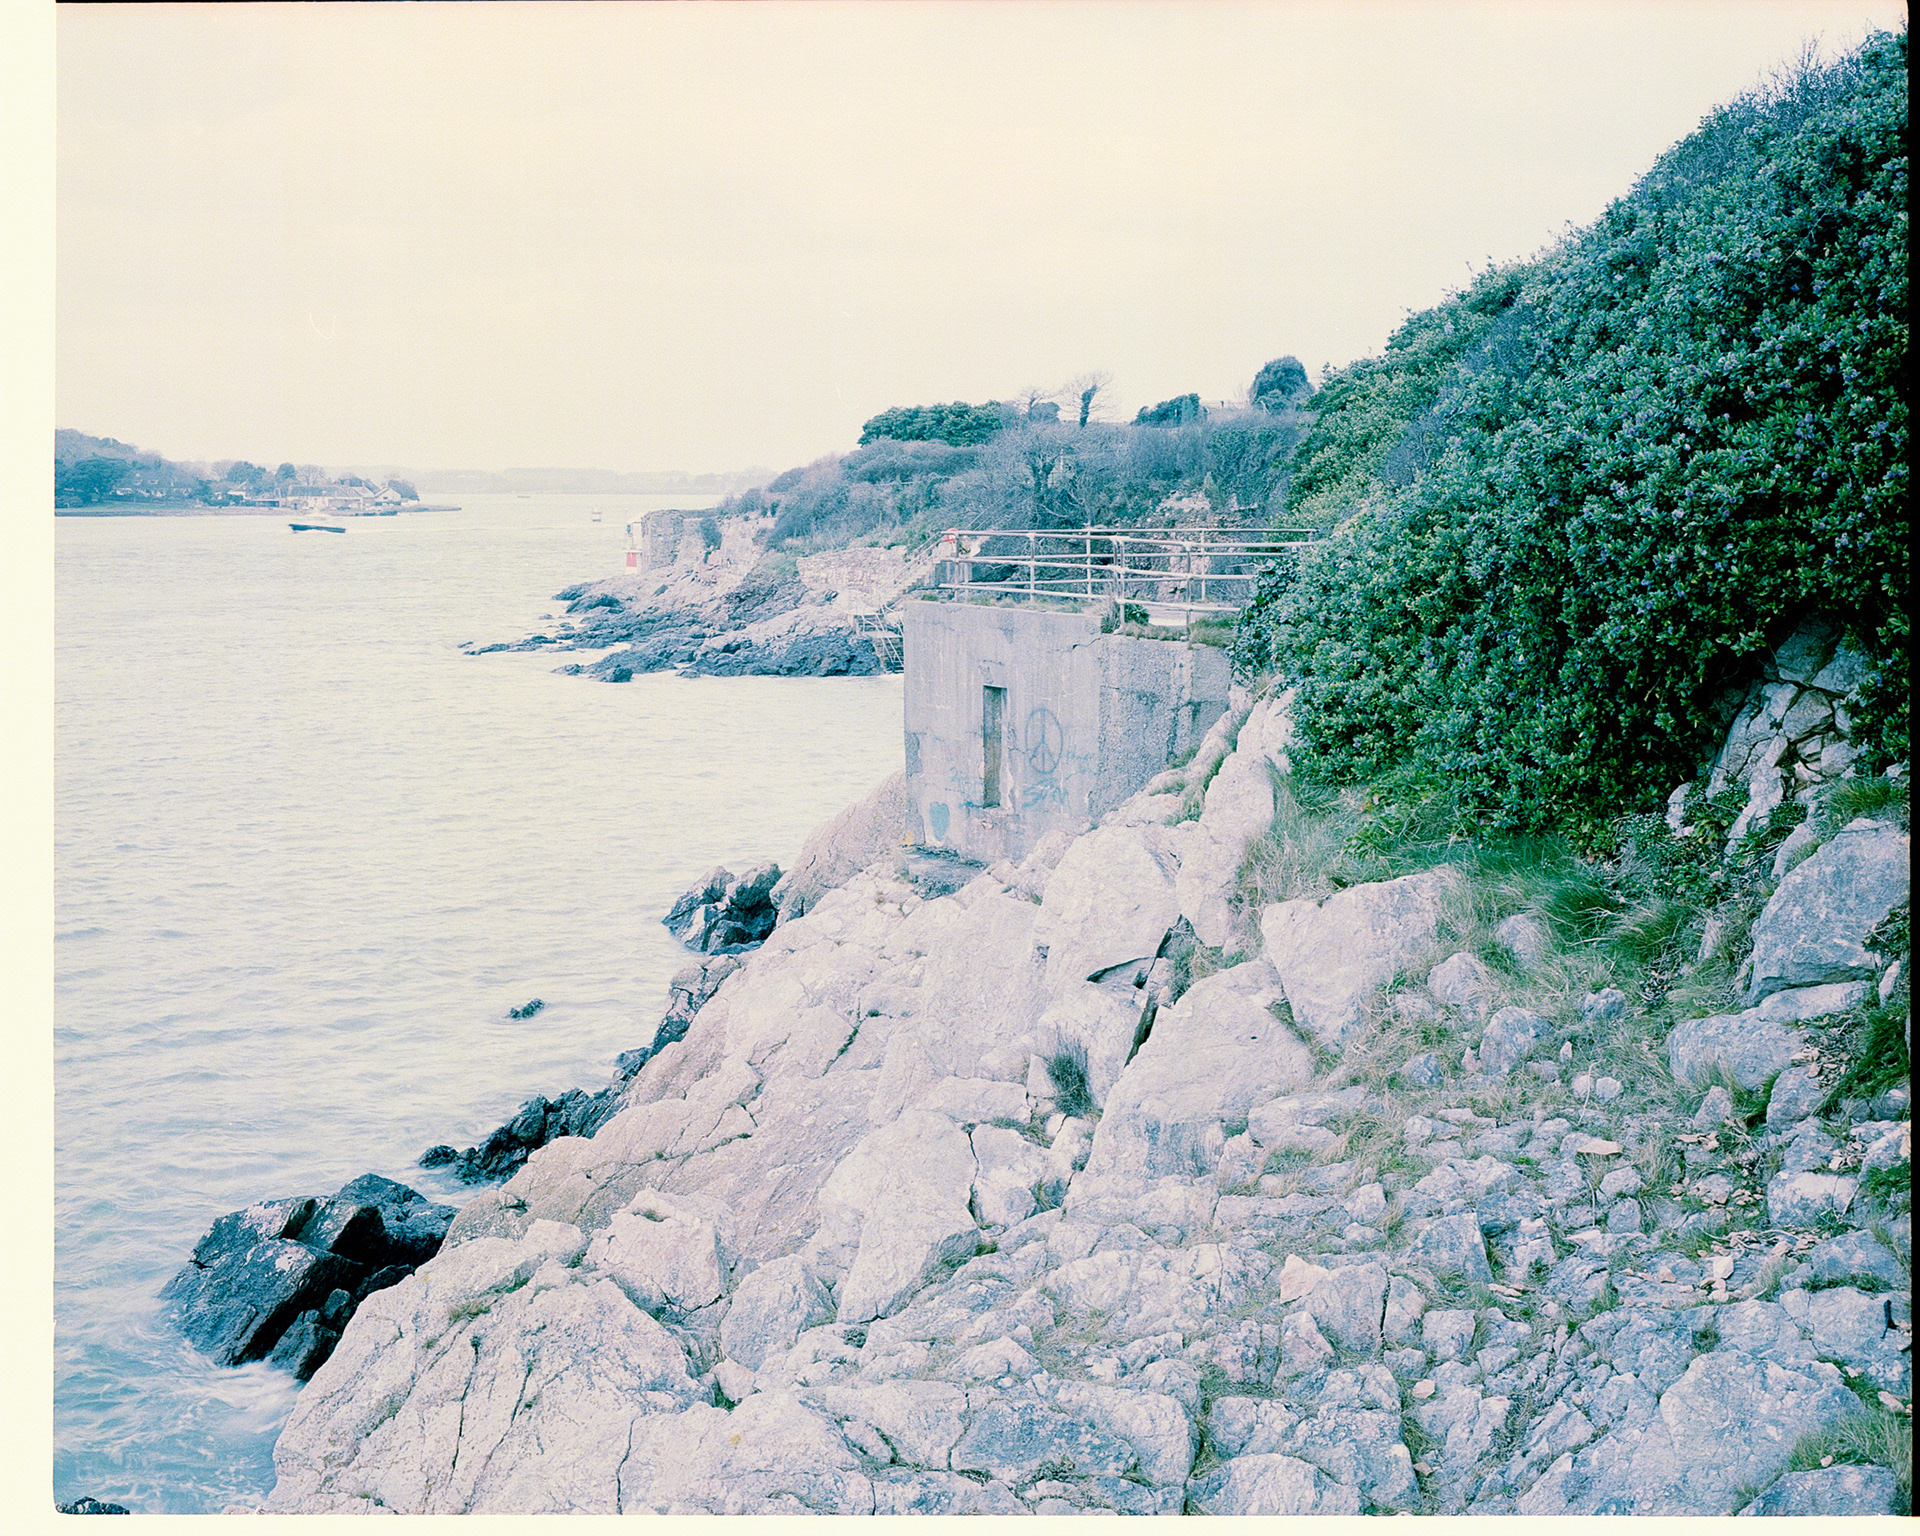
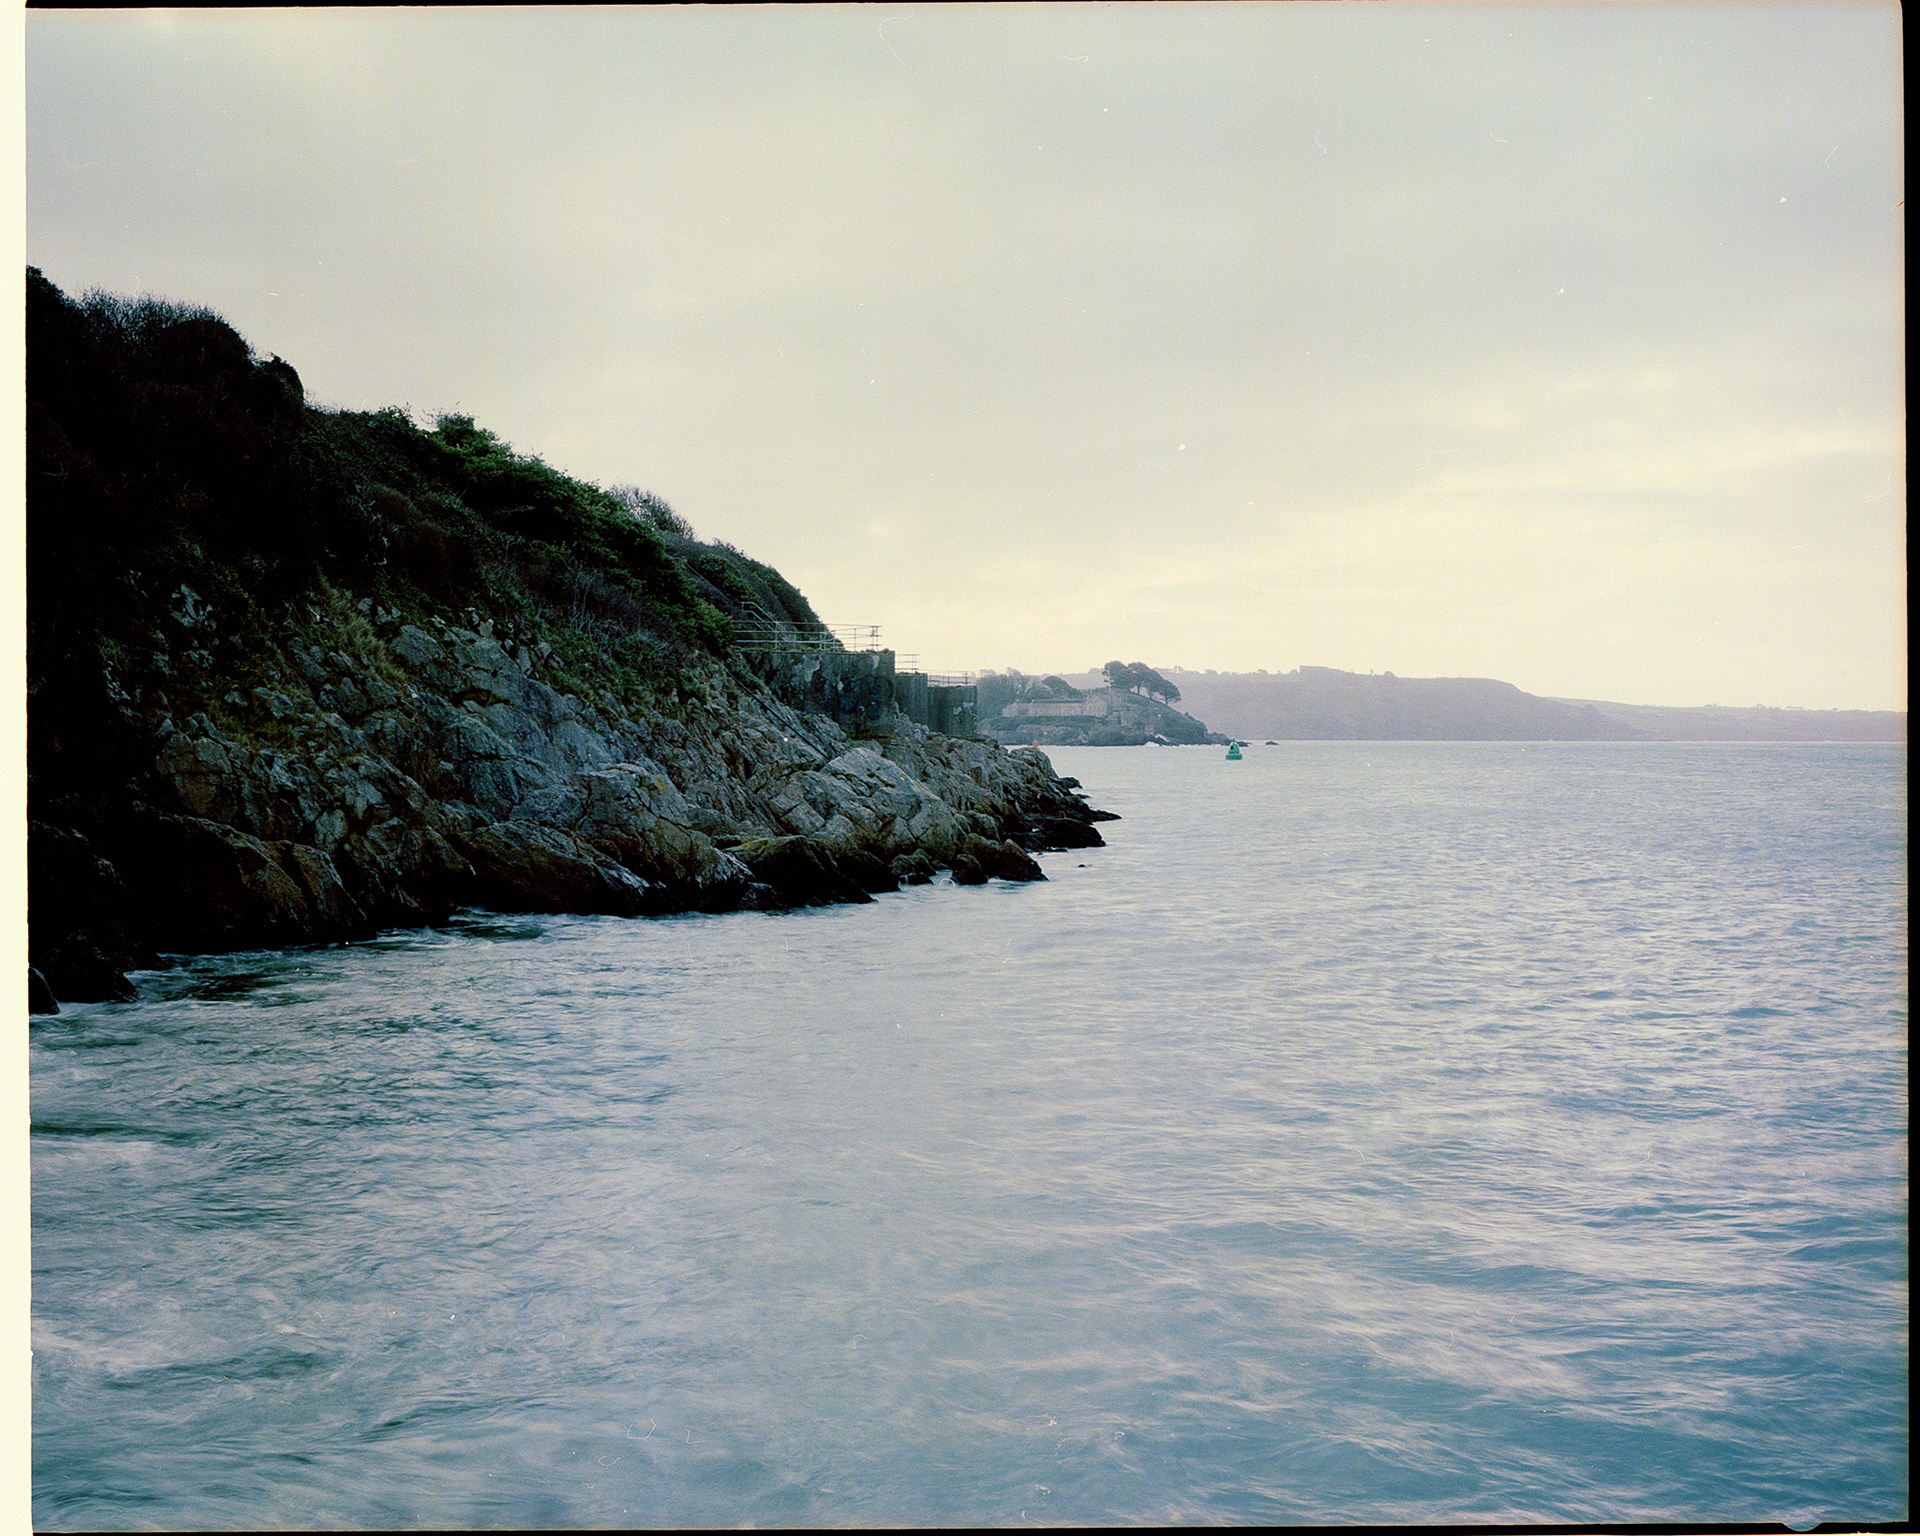
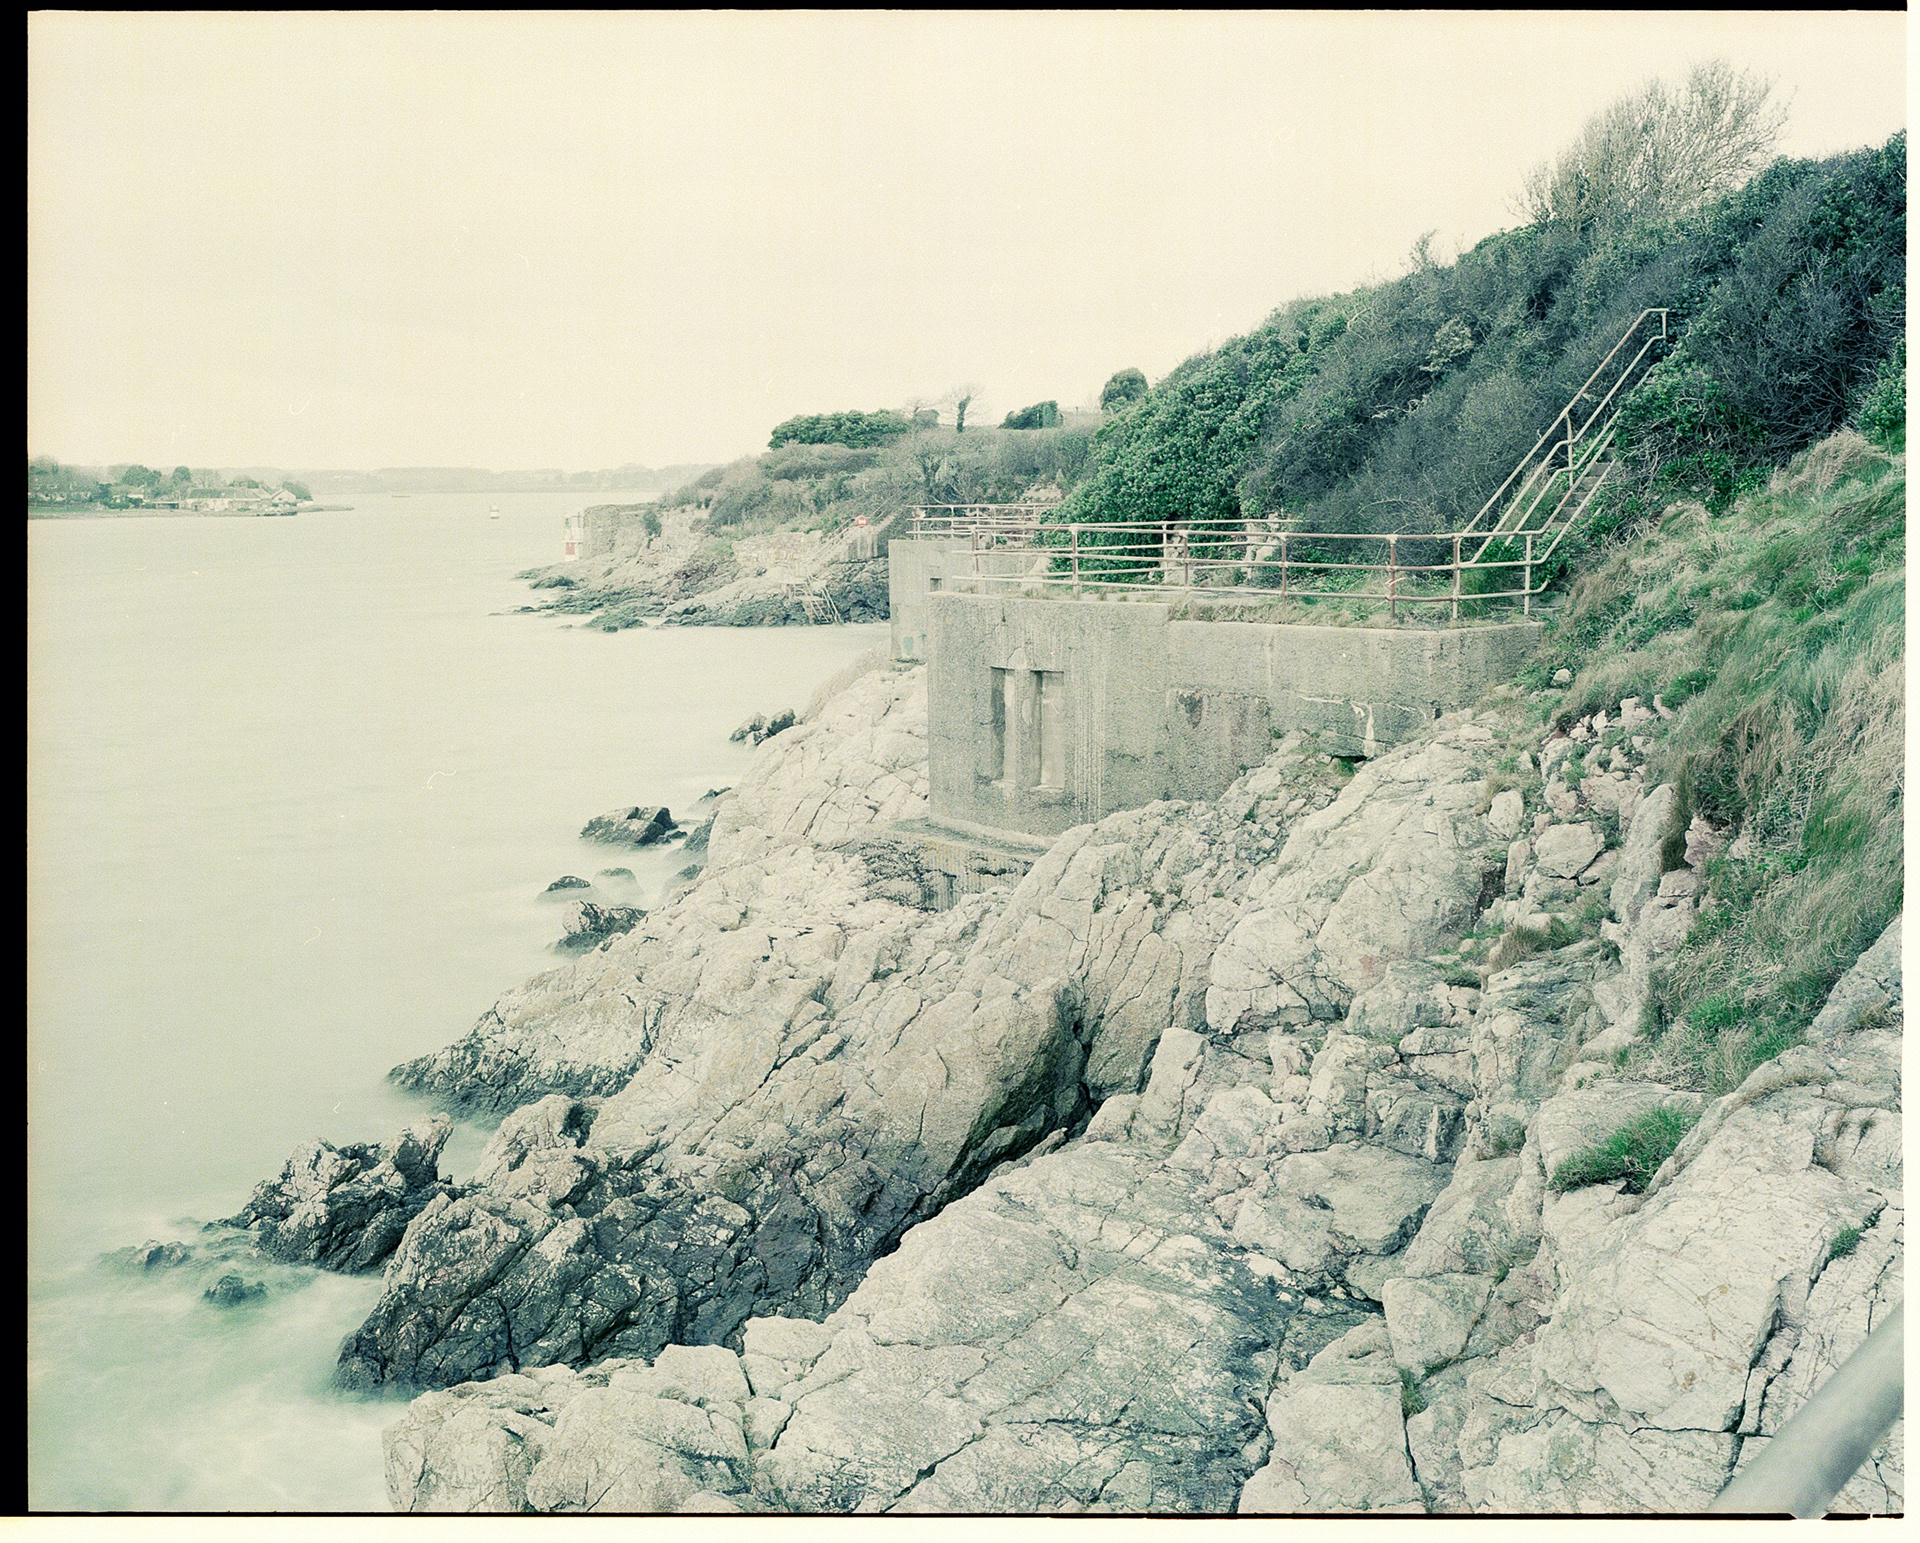
I did not have the light on my side when I was shooting this photograph. The sun was low in the sky and over the left hand side of the headland you can see. This meant that there was very little light on the rocks and pill box that I was shooting. This is where film has its limitations as you do not have as much leeway with the exposure nor exposure adjustment you can achieve in post without washing the area out with grain.
Before
After
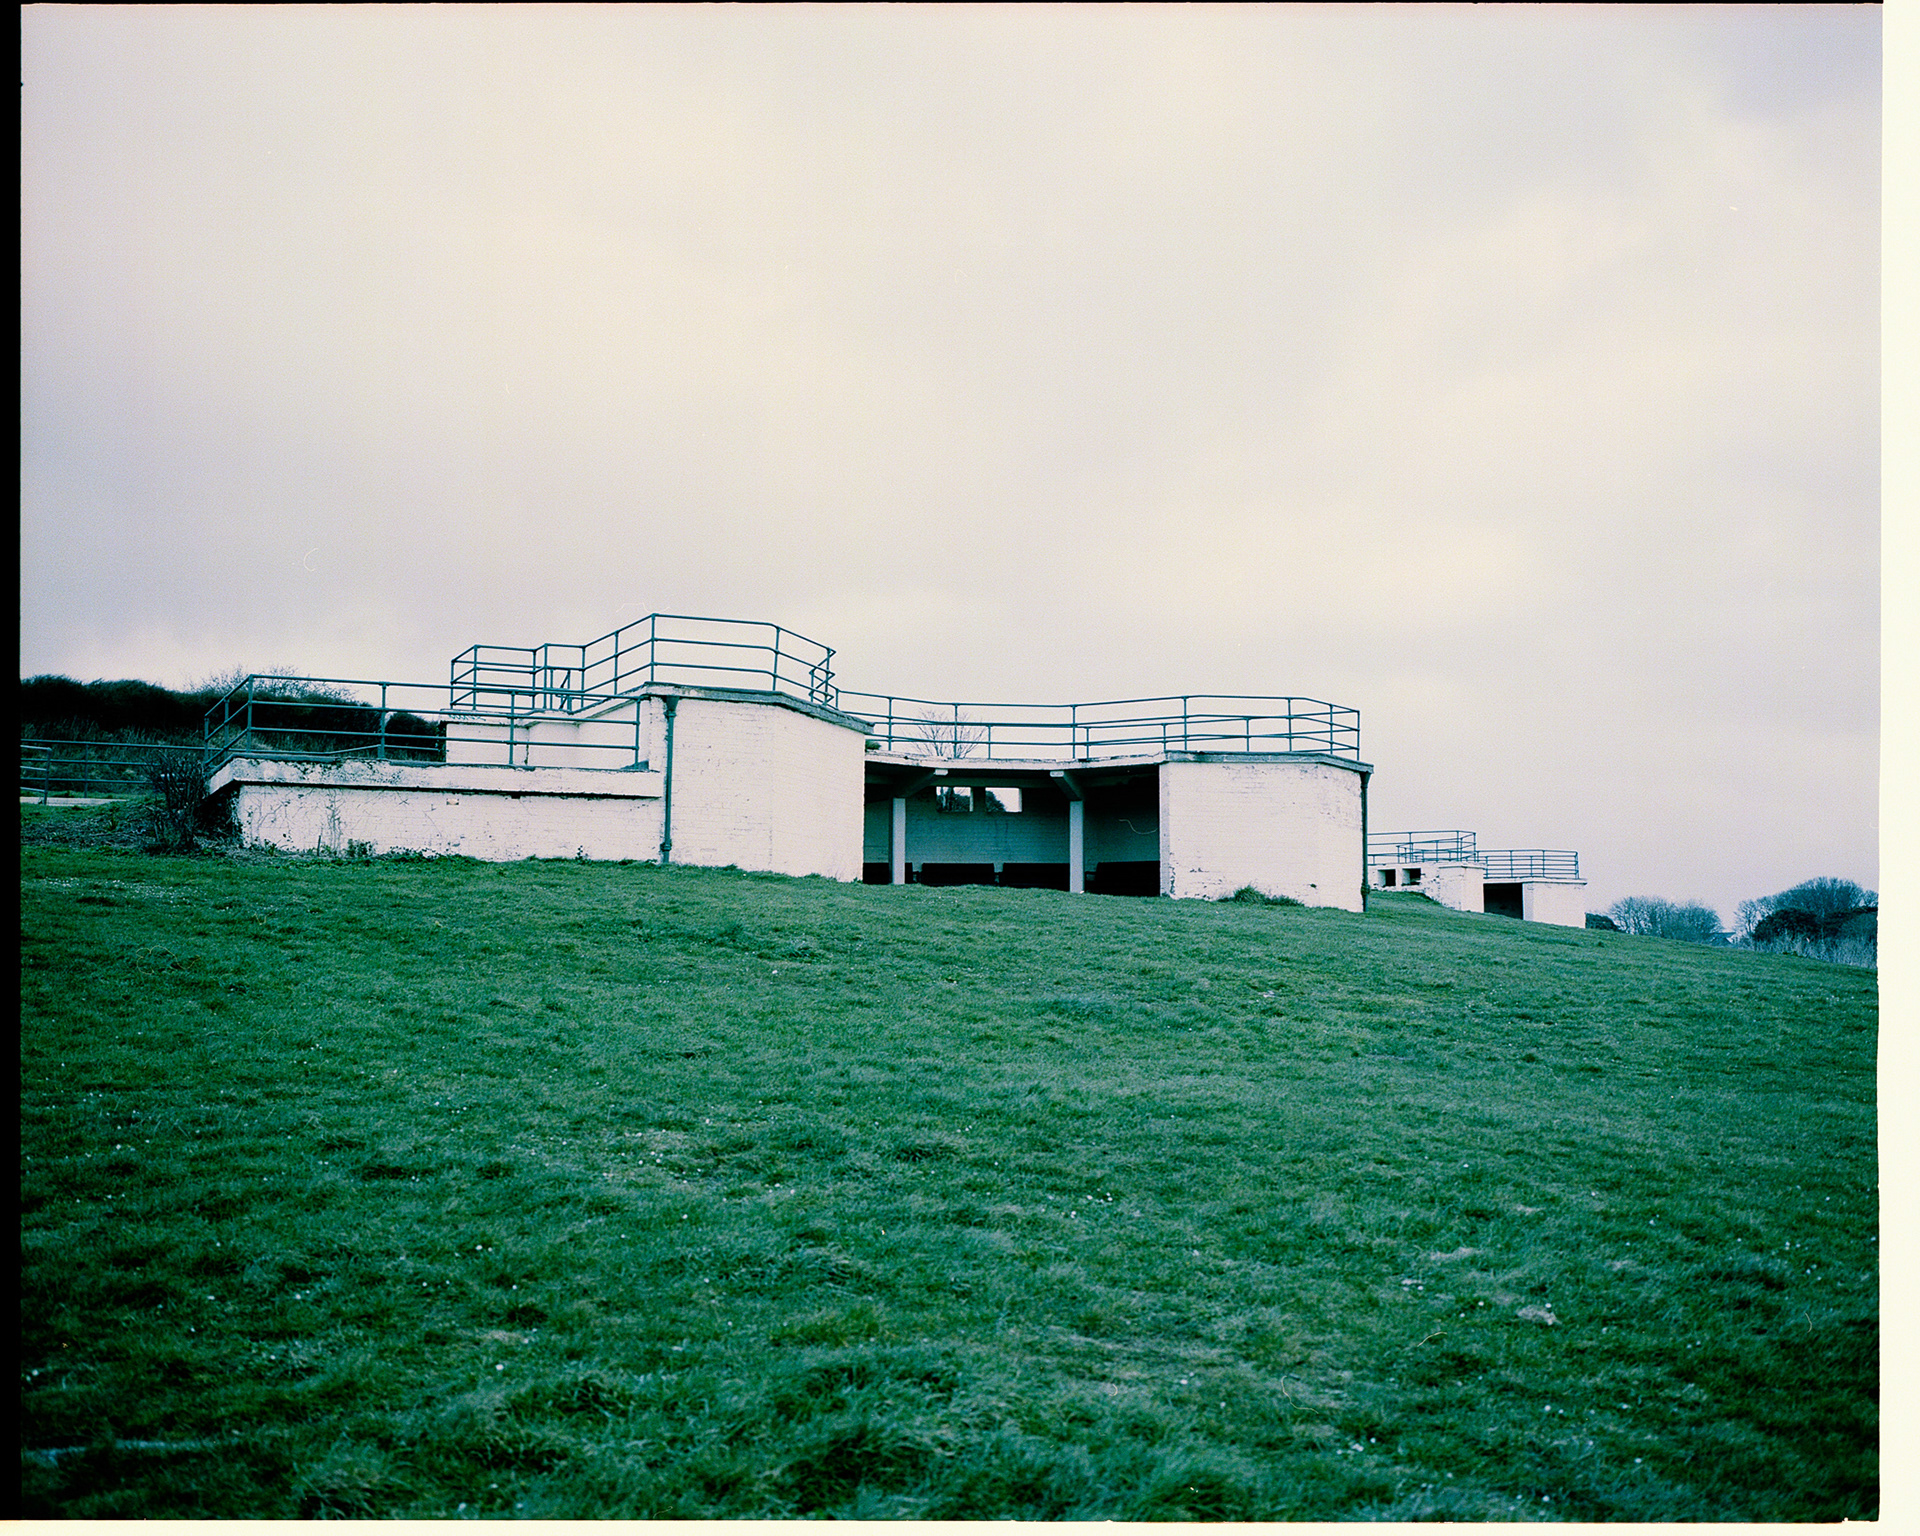
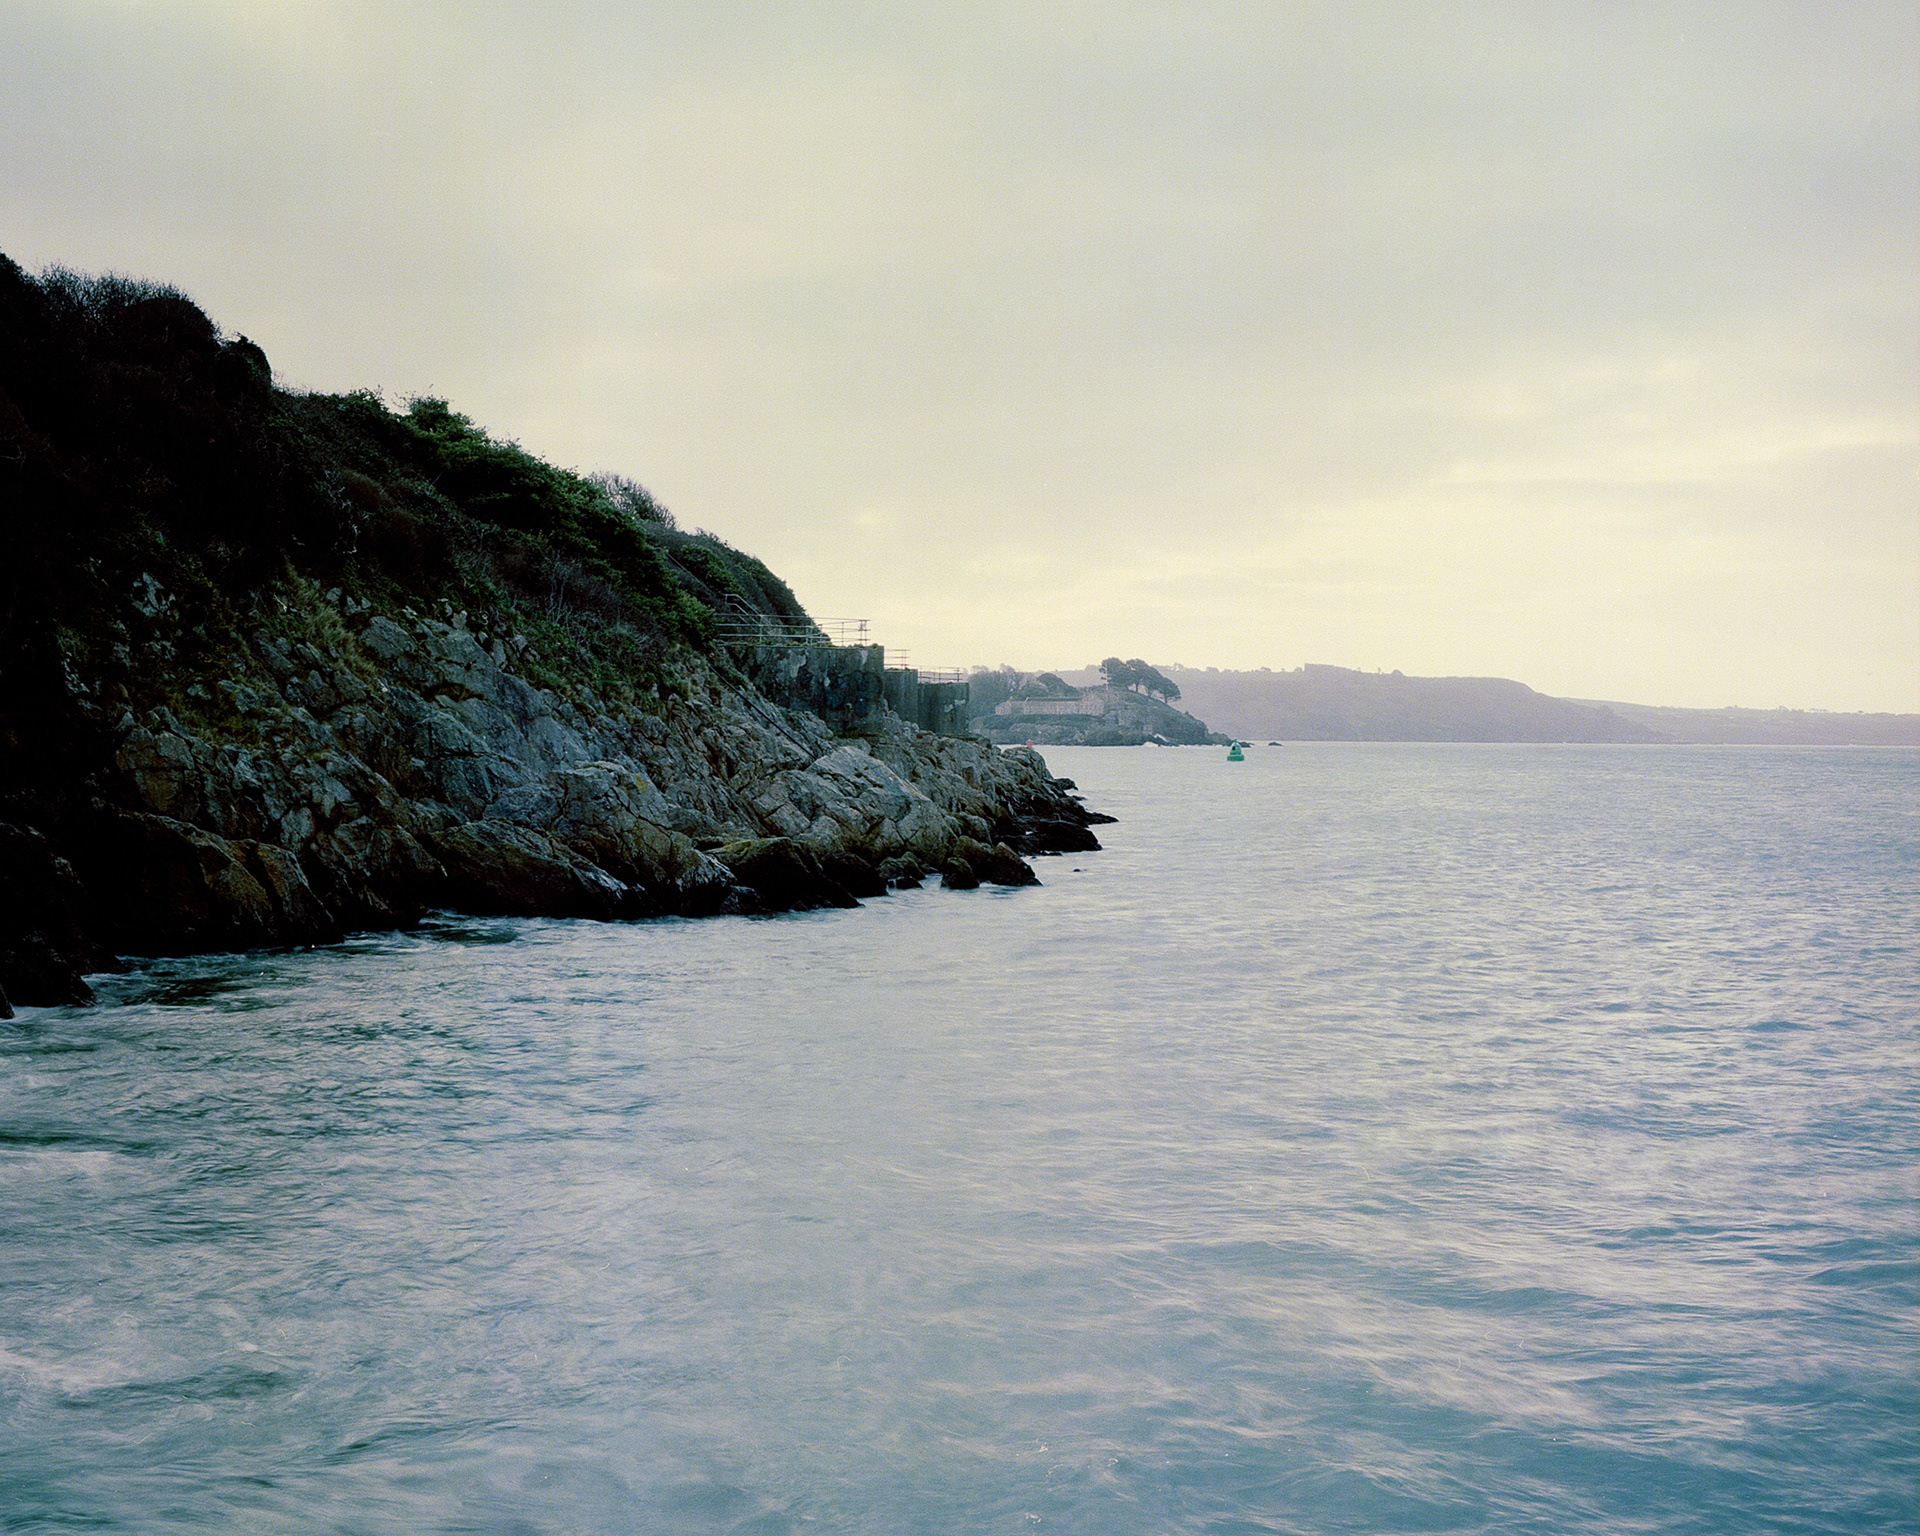
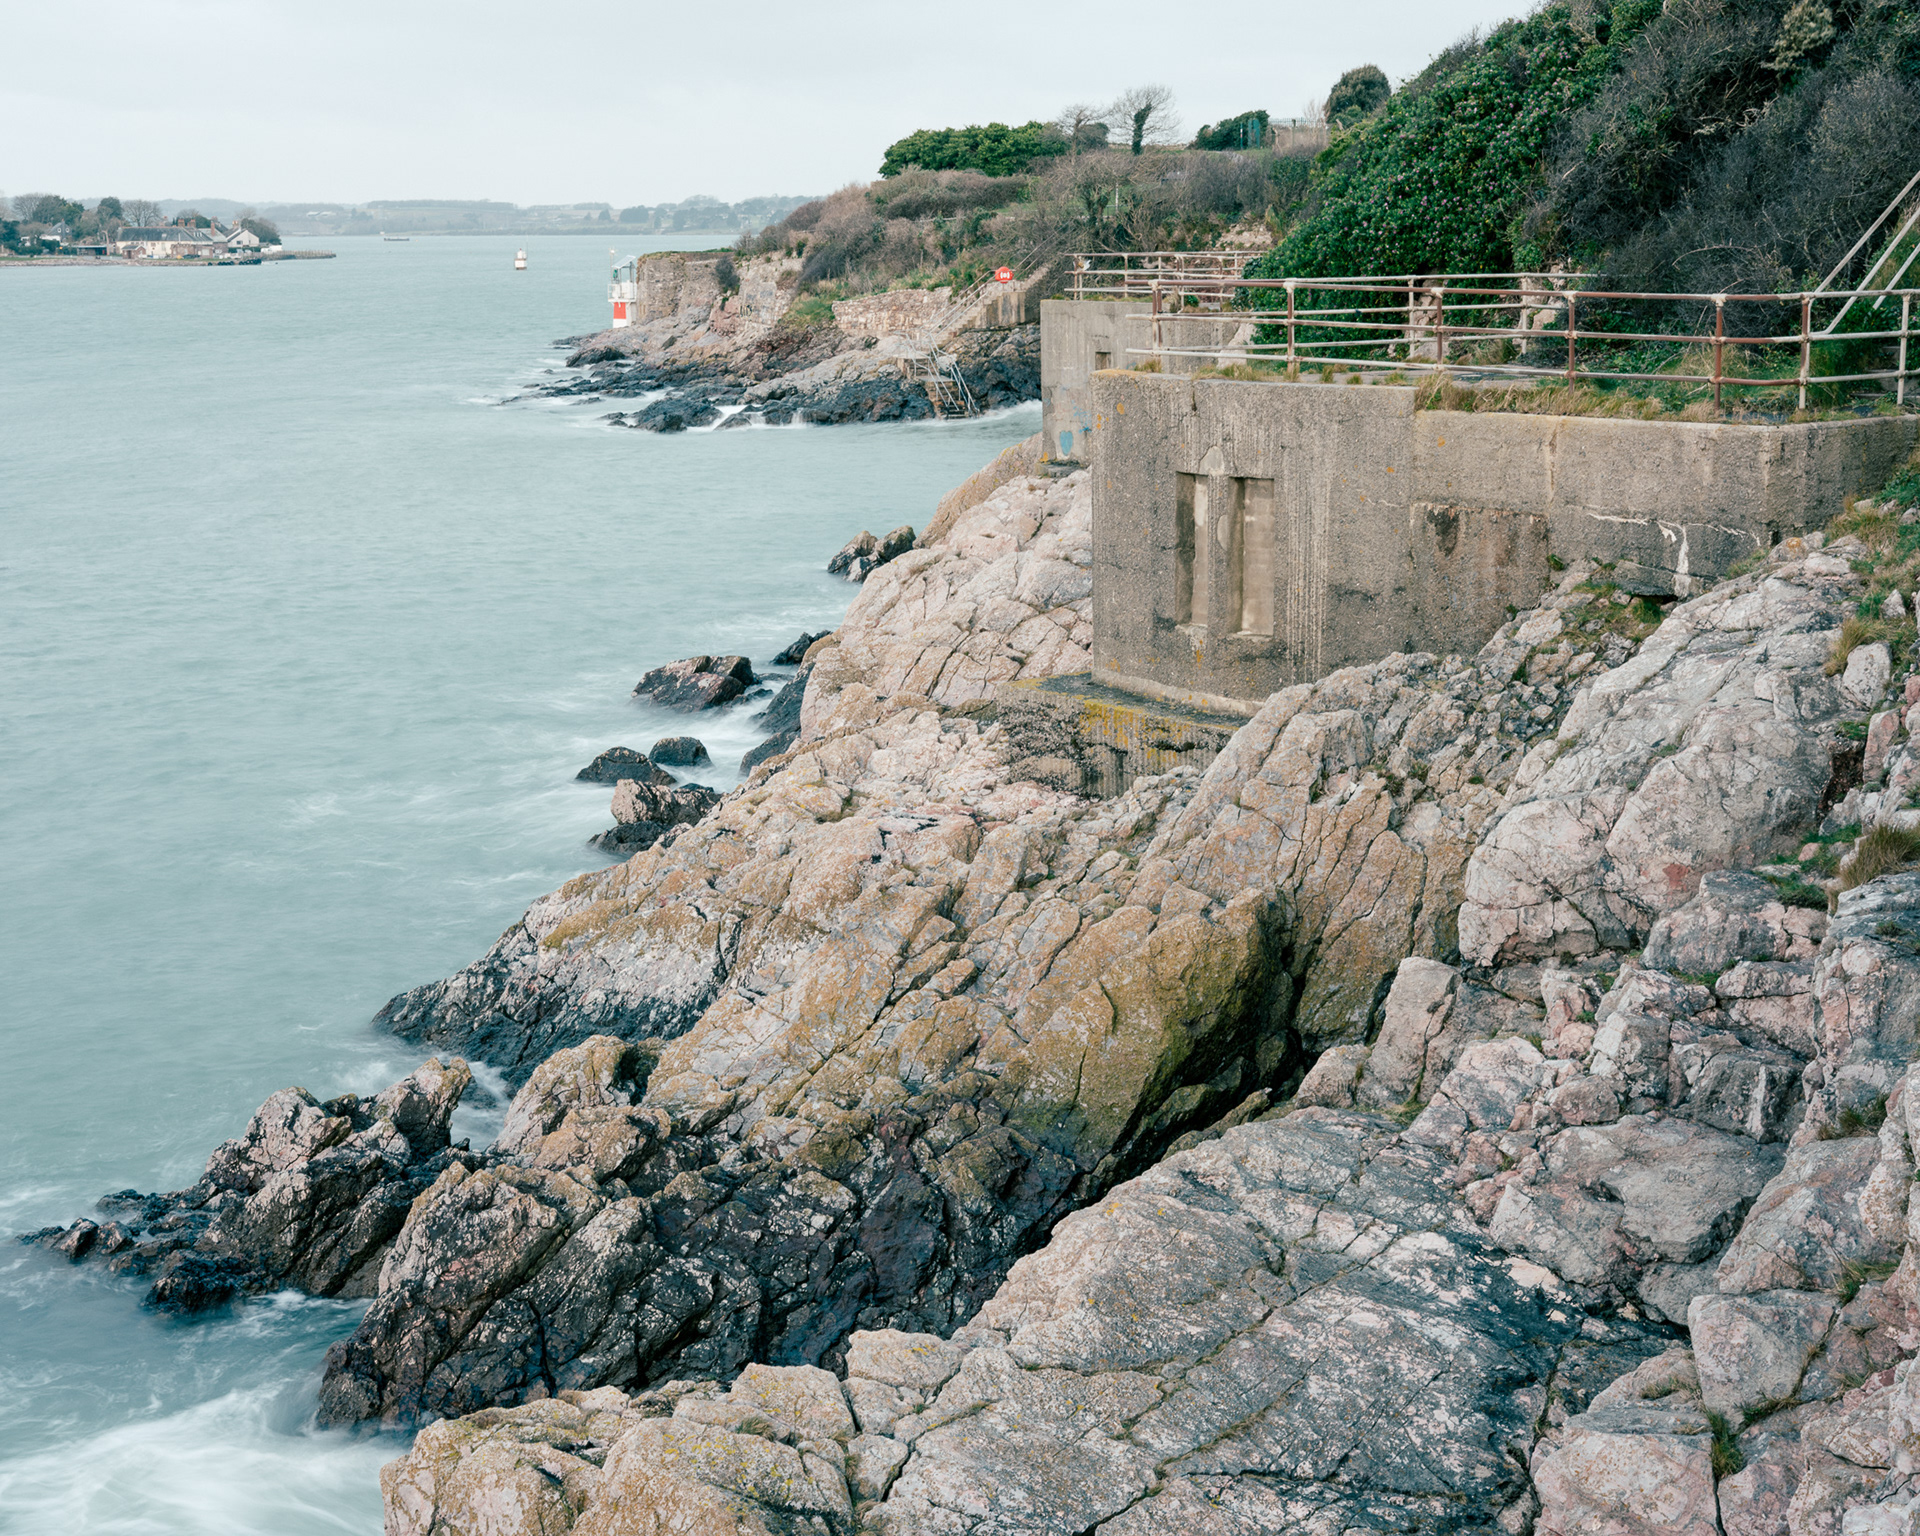
This photograph was also one of my best-achieved photographs as I shot it at the right exposure which then has enabled me to correct the white balance of the image. From this shoot, I am learning that it's paramount to get the exposure right in-camera as I think it is affecting the white balance of the film. This is something that I do not have to think much about when shooting on a live view digital camera so I like the fact that I am going to have to work out how to refine my photographs. I now know that I need to think so much about what I am doing in-camera every time I press the shutter button.
Before
After
Before
After
Digital and Analogue Comparison
I have been sitting looking at these six photographs for some time to try and work out how to describe the difference between the images and to work out which ones I prefer. I know that there is a difference between the images that I shot on the FujiFilm GFX and the Mamiya 7. The main element that differs between the images is the dynamic range that the digital camera captures. I feel like I have captured more details within the texture of the landscape with the FujiFilm. However, I am not sure whether this is because I am far more familiar with working with the digital processes of photography. I know that not all of my analogue photographs were shot with perfect exposure which will affect the amount of detail that is captured in the photographs. I also do not think that I did a very good job at scanning the photographs into the computer which is why the white balance is not correct in some/ most of the photographs. I think that when I perfect my analogue process, this will strengthen my images and make the comparison of the two mediums a bit easier to do. This is because I think that the digital images are far better and I will break this down a little bit further.
FujiFilm GFX

Mamiya 7

FujiFilm GFX
Mamiya 7
I think that these two photographs are the best to compare as the overall tones of the images are quite different. I do not think that my Portra photographs are looking like the tones of Portra that I am used to seeing. I think that this is because of the scanning process that I have been going through. The soft tones, low vibrance and almost pastel feel to the digital image that I have achieved, I believe is closure to the visual aesthetic that I am trying to achieve compared to the images on film. The whites in the Mamiya shot image are way too bright and washed out compared to the image that was shot on the FujiFilm which is one of the reasons it does not stand out as much. The eventually toned photograph of the FujiFilm allows the viewer to see all the details that are in the image which makes it lighter on the eye to view.

FujiFilm GFX
I think that these two images are the best to compare. This is because they are both the strongest image shot in their separate mediums, shot in exactly the same frame which makes the comparison easier to make. The pastel-like colours that I have created in the FujiFilm photograph do not reflect the true colours that the light was created on the landscape the morning of the shoot. The warm and almost golden glow that is bouncing off the rocks is not what the camera captured that morning. The image shot on the Mamiya is more true to the colours that the sun was creating on the landscape that morning. It also produces the aesthetic that I am working on as I do not want my viewer to feel a warm feeling towards my work. The detail and texture captured in both photographs are relatively indistinguishable as the exposure and white balance was spot on in the making of the images.
The Why

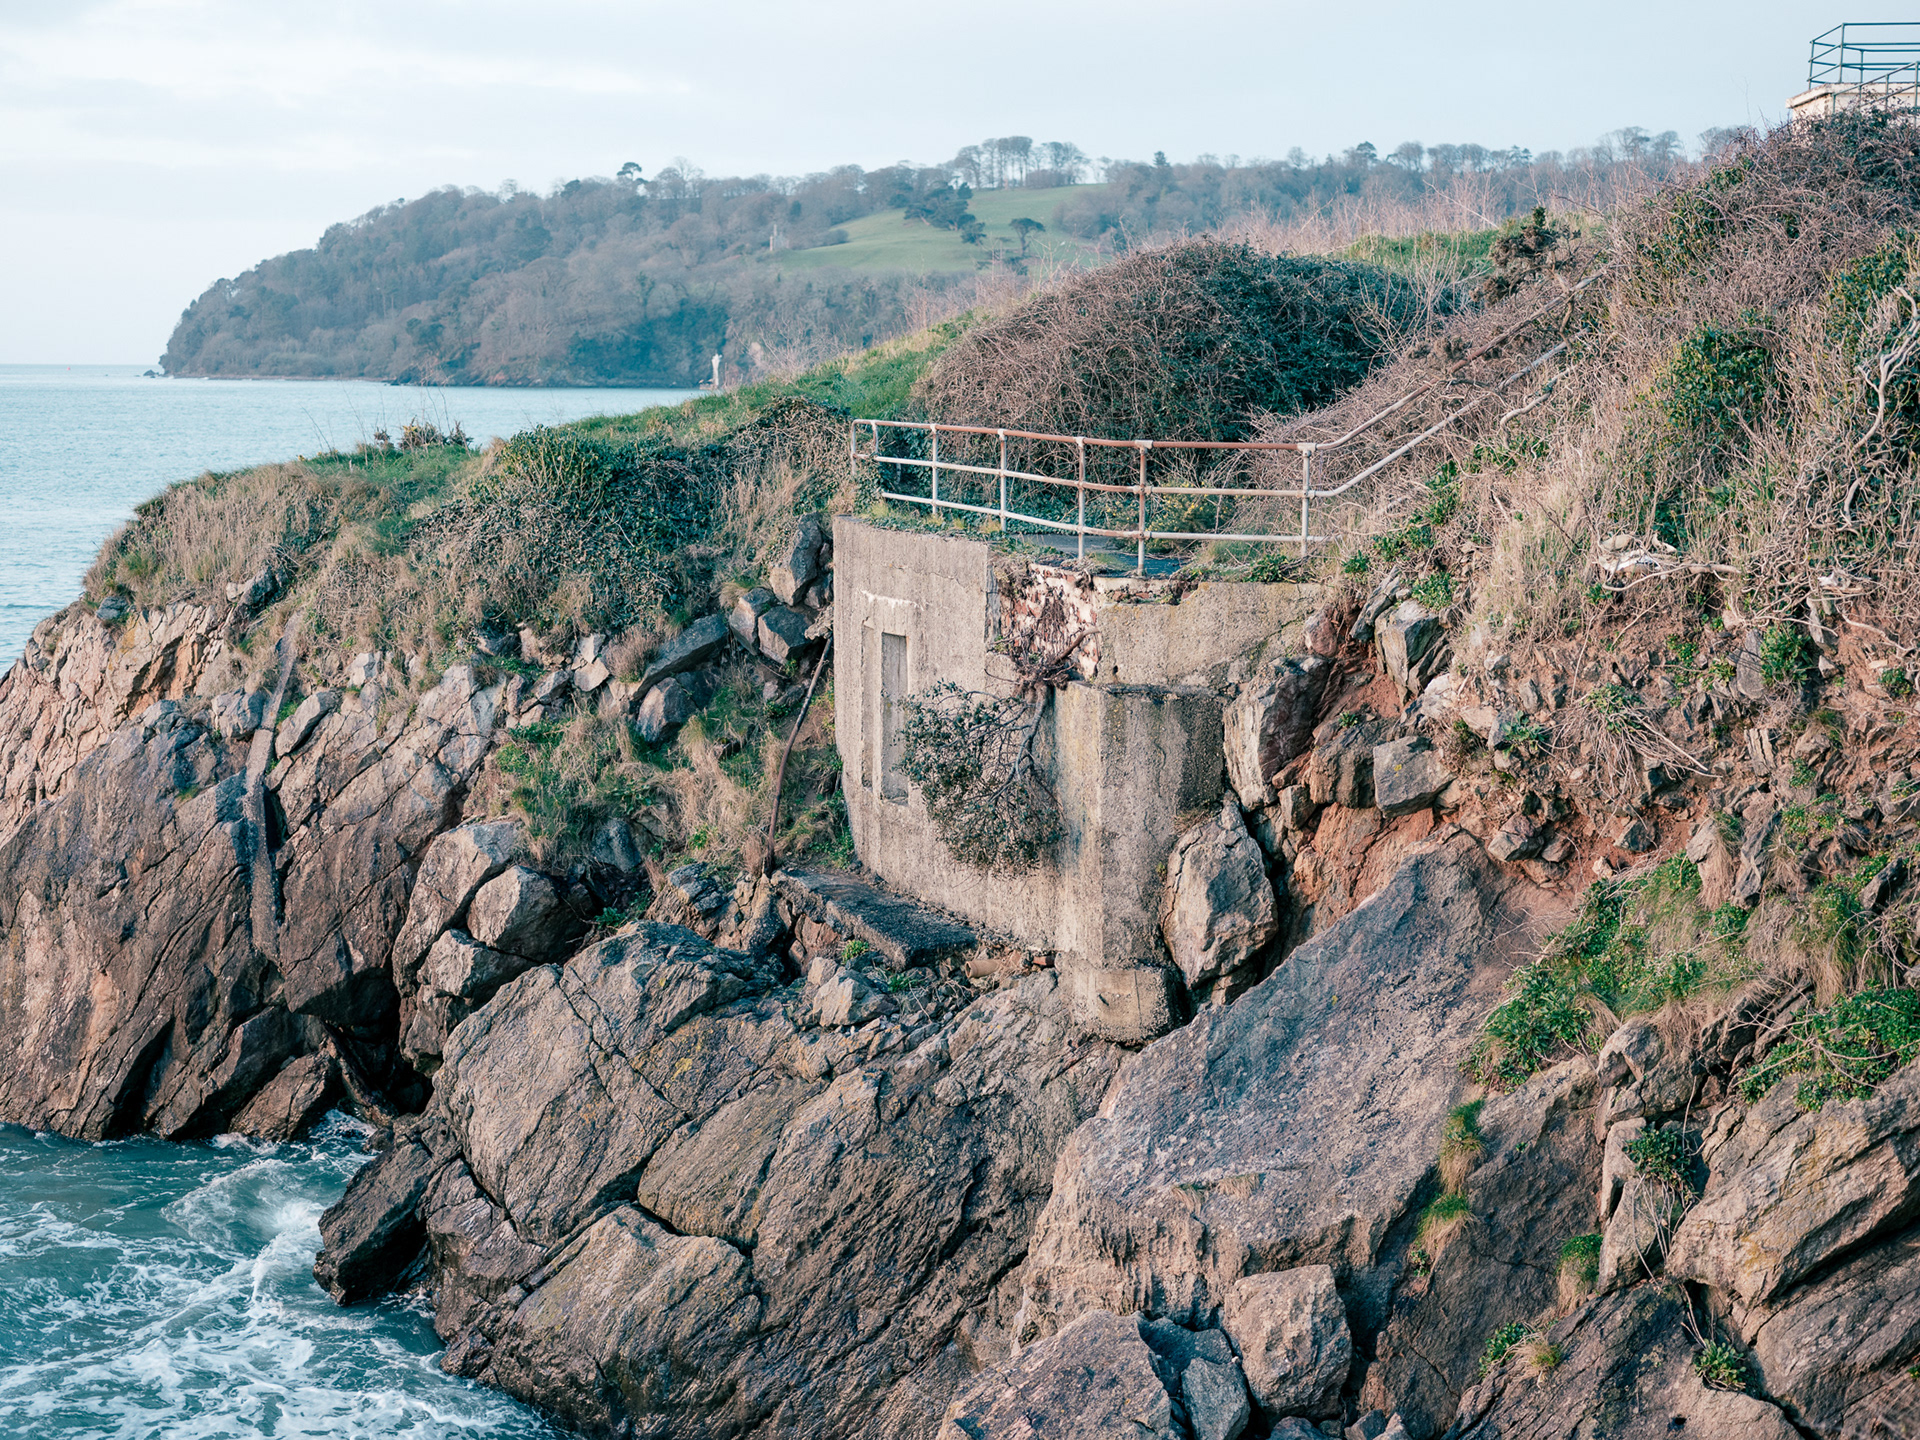
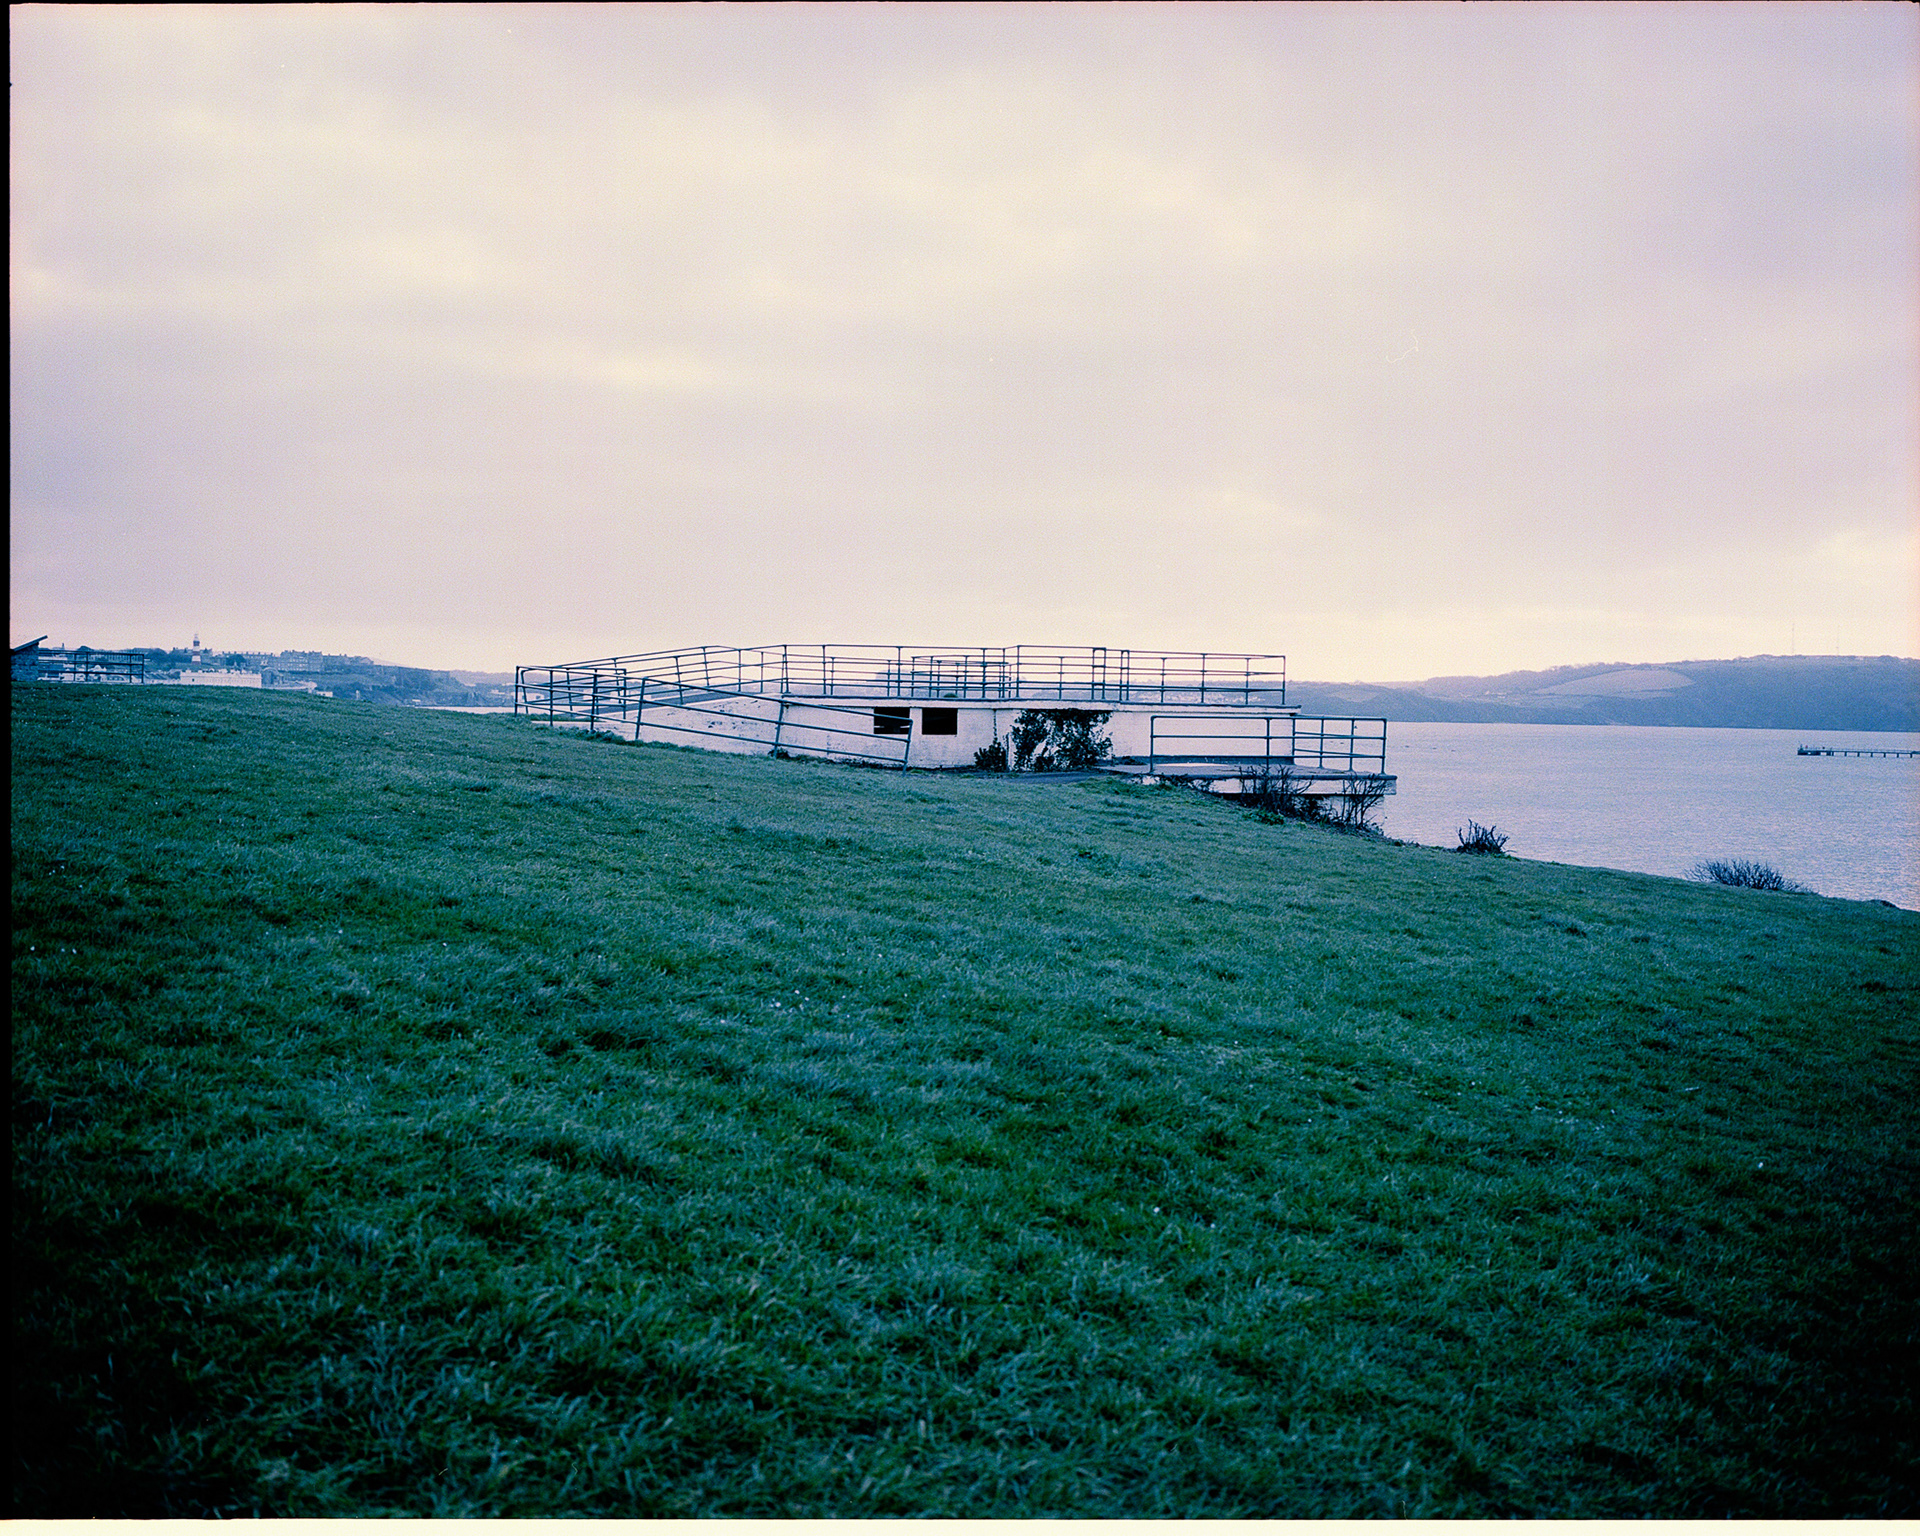
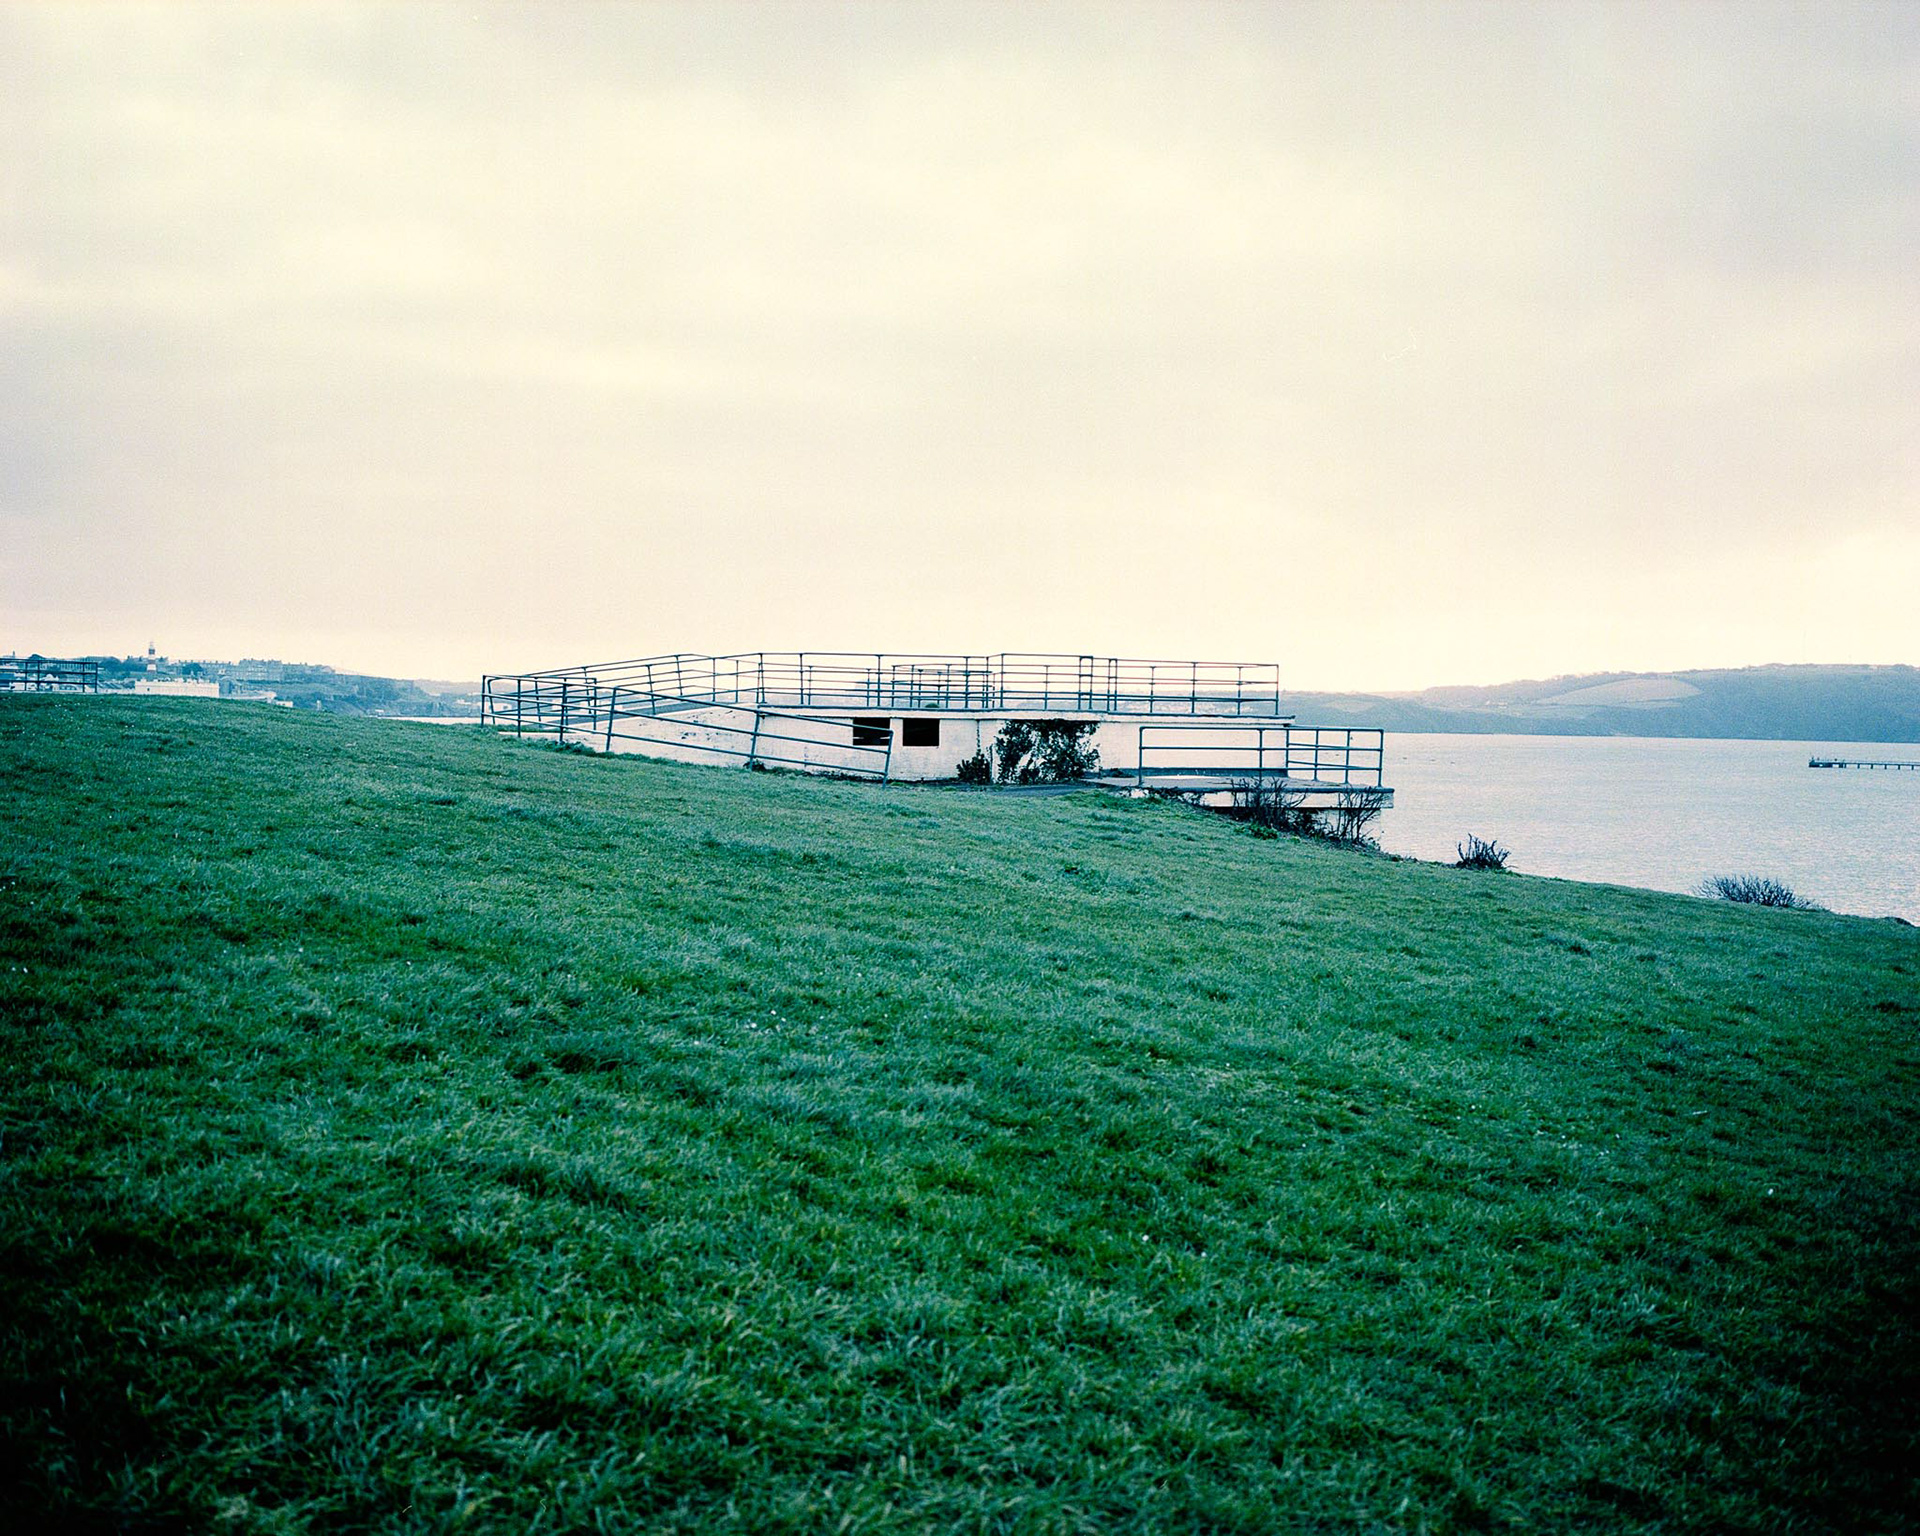
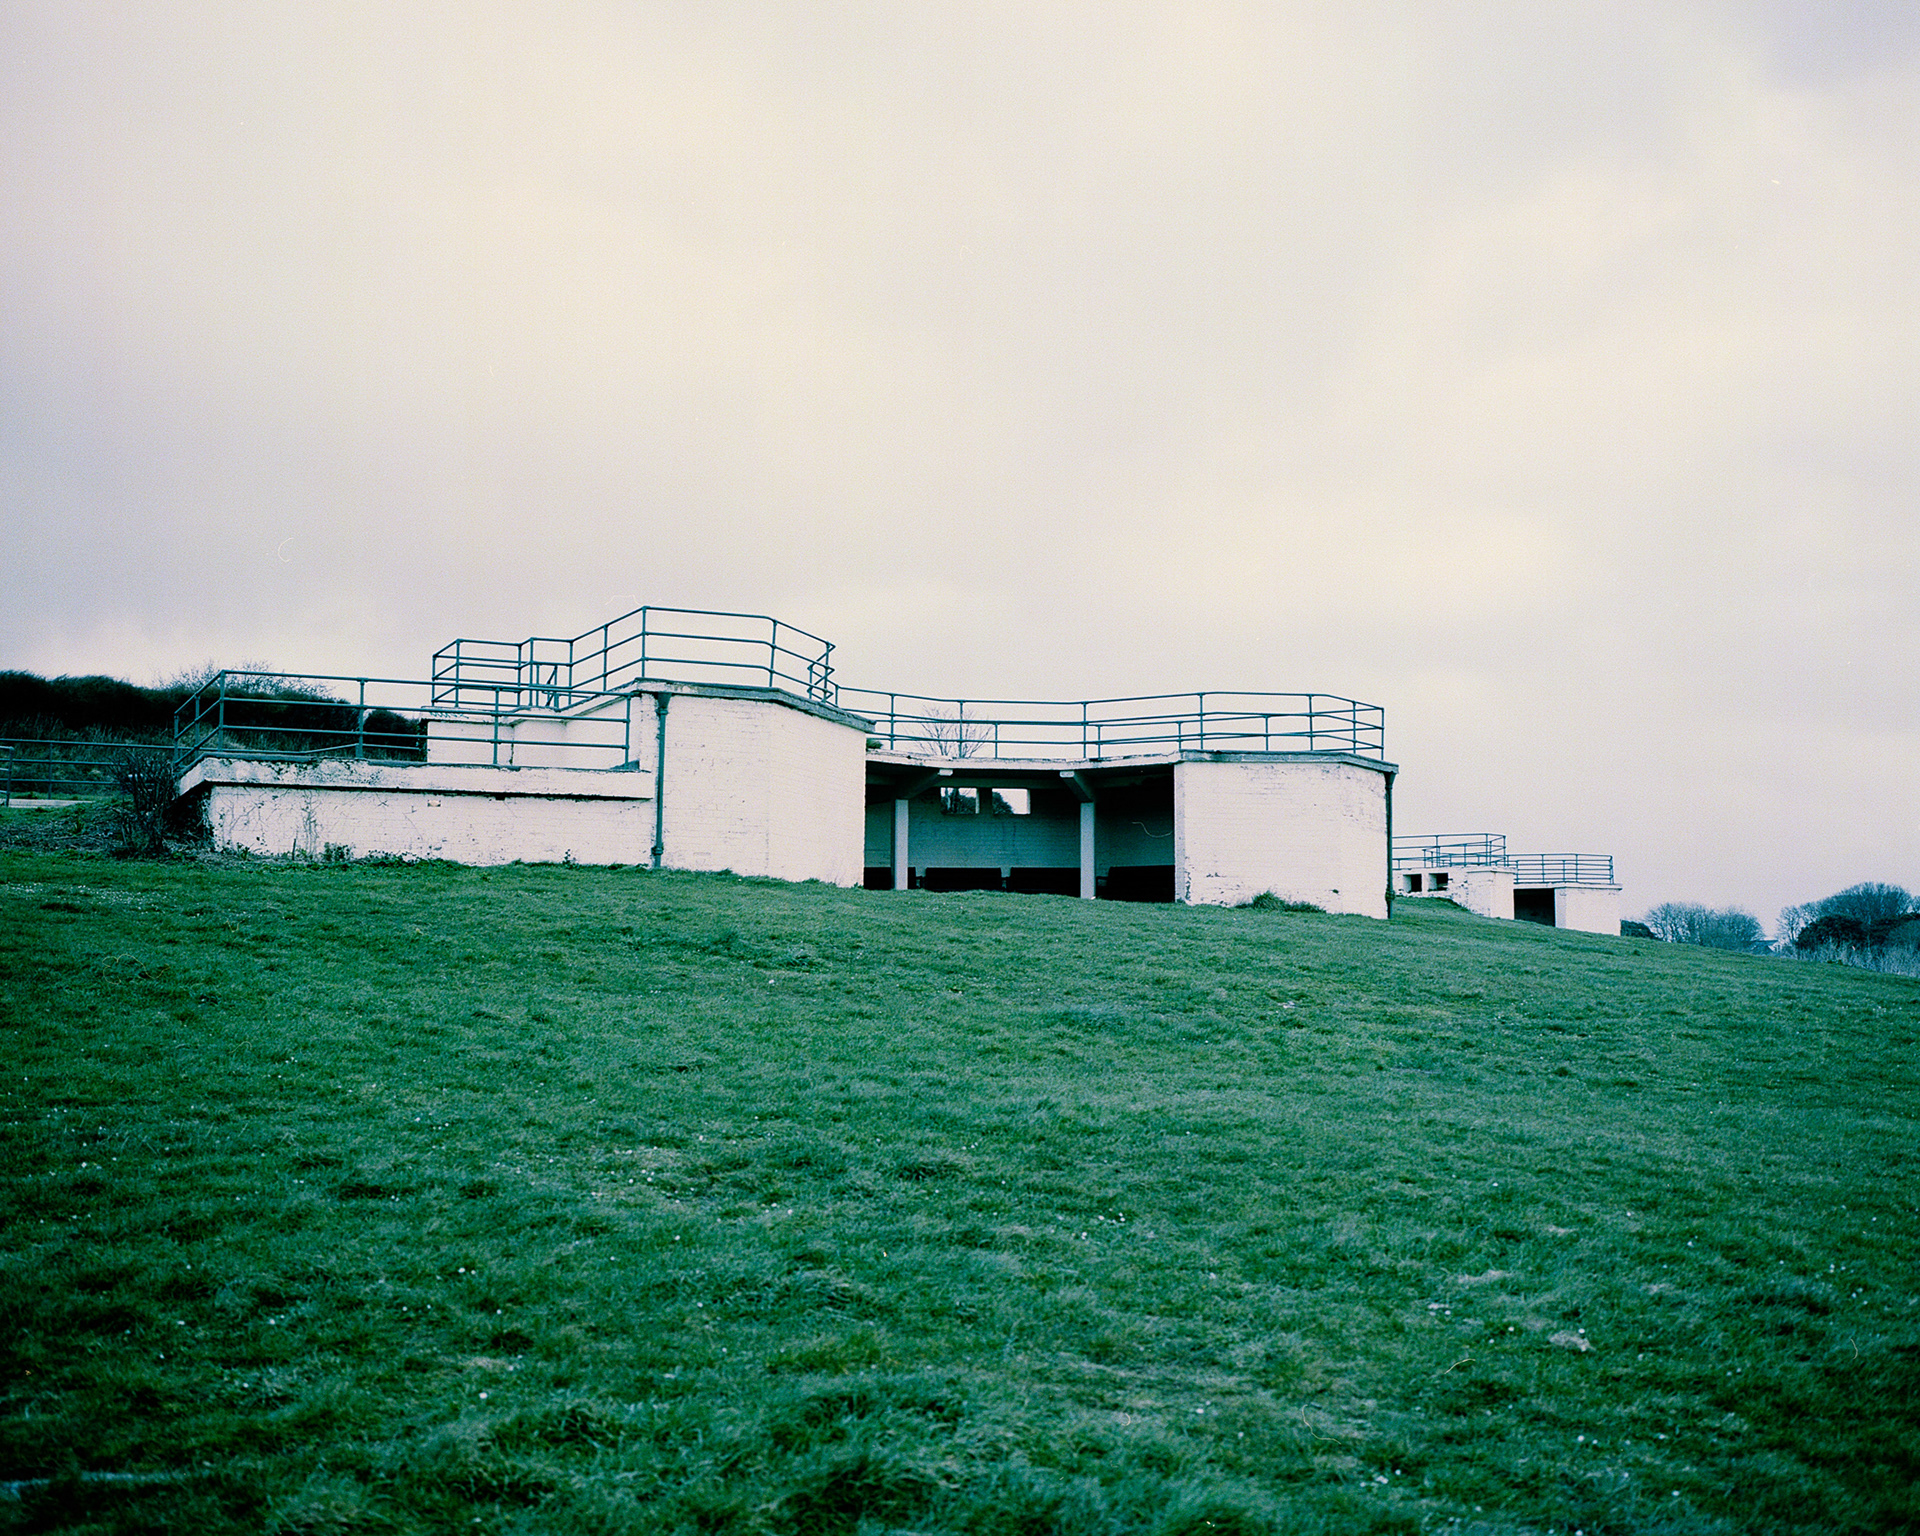
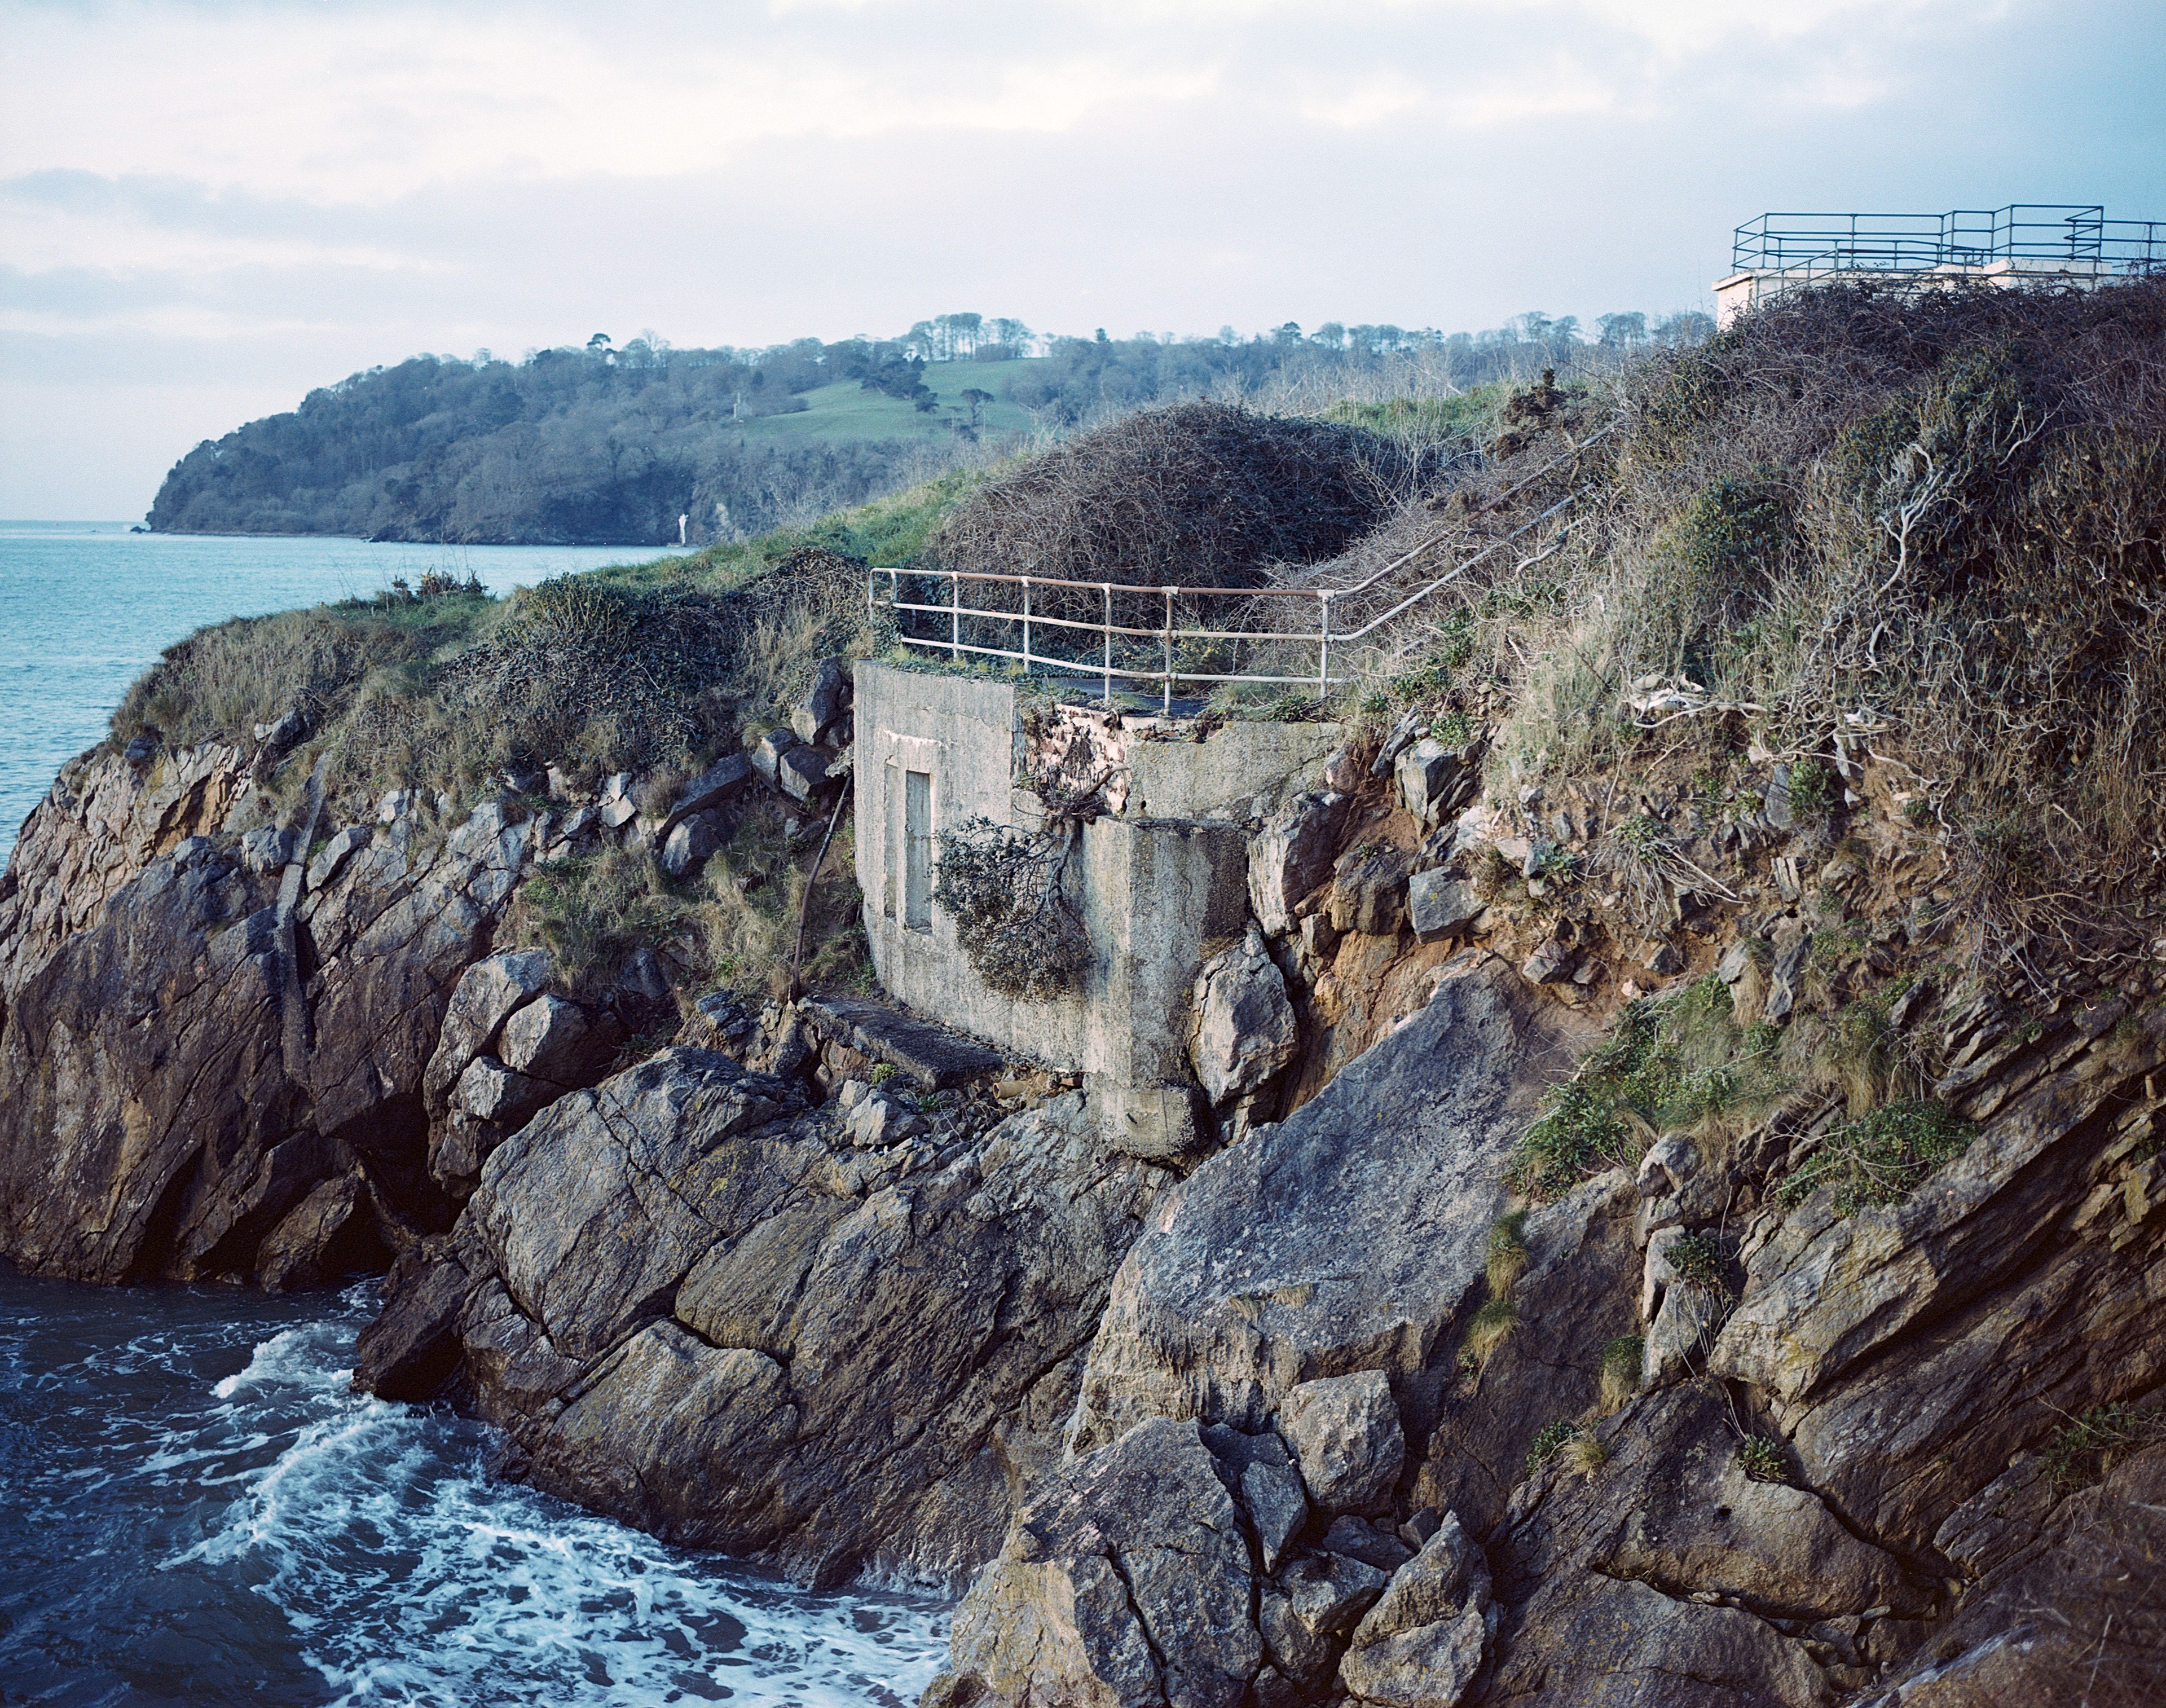
I took these photographs to visually explore one of the many ww2 defences locations in and around Plymouth. The Western King Battery at Devils Point would have been a pinnacle defence point, protecting the mouth of the River Tamar which provides the home for the Naval presence in Plymouth. Now as best shown in this photograph, you can see that the site has been taken back by the land and represents a distant memory of time. I am sure that there are many people that don’t even know what these buildings are nor do they know that they resemble the Second World War which placed extreme hardship on Plymouth. The land's natural progression has taken over since this Pillbox has been bricked up and no longer has any purpose. You can see that a tree is growing out from the side of it which also seems to have died. This emphasises the feeling of sadness that I am conveying in this image. The only form of living life in this photograph is the green growth and trees which often has the connotations of hope and new life. However, seeing the tree falling down the side of the Pillbox makes me think that it hasn’t survived, the life has been sucked out of it which could be a semiotic of the life that was sucked out of Plymouth during the time of war. There is also another war that is being shown in this photograph, the one that is ongoing between the land and the sea. You can see the fallen rocks on the right-hand side of the Pillbox and the undercutting of the rocks on the left hand side where the land meets the water. As well as the Pillbox, the land is slowly falling into the water and it will eventually take the concrete block with it. If these defence sites fall into the sea then that will be the last of the visual representations of the war along the South coast. I am documenting the way in which the concrete sites have been taken over by the land. An interesting notion that sets forth the idea that when humans stop interacting with the land, then the land itself starts to reclaim what man once damaged.
Overall, I am happy with this shoot and what it has taught me about my processing of analog photography. It is something that I am going to work on with the next set of negatives that I have in order to be more satisfied with the outcomes of the photographs. This shoot has also stemmed me to think about the kind of research that I want to undertake over the next few weeks. As well as looking further into the history of the Pillboxes and The Second World War, I want to look into the theories and research that is being done on man's impact on the land. This is because I am building more than one narrative with my photographs, one which is directly linked to the history of these sites, and one that speaks about how the land reacts once man has changed or built on it.